The Custom Design Process: Kira & Willem
This is the second in my new series, The Custom Design Process, where I walk through the steps I've gone through with a particular client to come to their final custom designed invitation. I find it so fascinating, once a design is finished and the invitations have been printed and mailed, to go back in my files and look at the very first draft for my client. Because most of my proofing process is digital, I have files saved in my email and on my computer from every single step of the way. Some designs are very close at the first draft, and the final design isn't too far removed, but others start out SO far from how they finish. If you've ever wondered what the process can be like, here you go! Kira & Willem
1. Inquiry- The first step in the process is for the client to reach out and start the conversation about what s/he is looking for in an invitation. Sometimes this includes sharing Pinterest inspiration, color choices, and general feel. And sometimes, it's a big fat "I have NO idea."
I've known Kira for most of my life, but we only see each other for a week each year, and we spend most of our time in swimsuits and bare feet. While I feel a great connection to Kira and her family (our mothers are like sisters) I wasn't sure what kind of style she'd go with for her wedding. So, I asked all the normal questions, and while she gave me a little guidance, the general response was "Work your magic!". She said they were having a backyard wedding, with greys and purples and a casual, international feel.
2. First Looks - The next step is for me to start drafting up some samples based on the ideas the couple provided. I generally provide three First Looks.
I tried to hone in on the backyard feel. Fresh flowers, strings of lights, etc. The first two designs were to be a layered flat card:


The third design played with the idea of travel a little more, and I found this perfect quote that totally fit Kira and Will (and the fact that they had traveled together all over the world and were getting married at her parents' home!)


3. Honing in - The next step is for me to create another set of proofs based on elements from the First Looks that the client wants to see more of -- which fonts they like, which layout is best, and which color combination they prefer.
Not surprisingly, Kira, Will and their parents all loved the map design. Kira wanted to try out using the fonts from the Light String invitation, and she wanted to see a little more purple. In general, she wanted a more casual, whimsical look. We weren't sure about the grey, but I said I'd send them a few physical samples, and maybe we'd lighten it up with the envelope. In round two, I brought back the lanterns for a minute just to see if they liked that theme in the map enclosure:


4. The Details - Putting the finishing touches on a design is maybe my favorite part. This is where I hand my design over, so to speak, to the couple, and let them perfect all the details to their taste and their event.
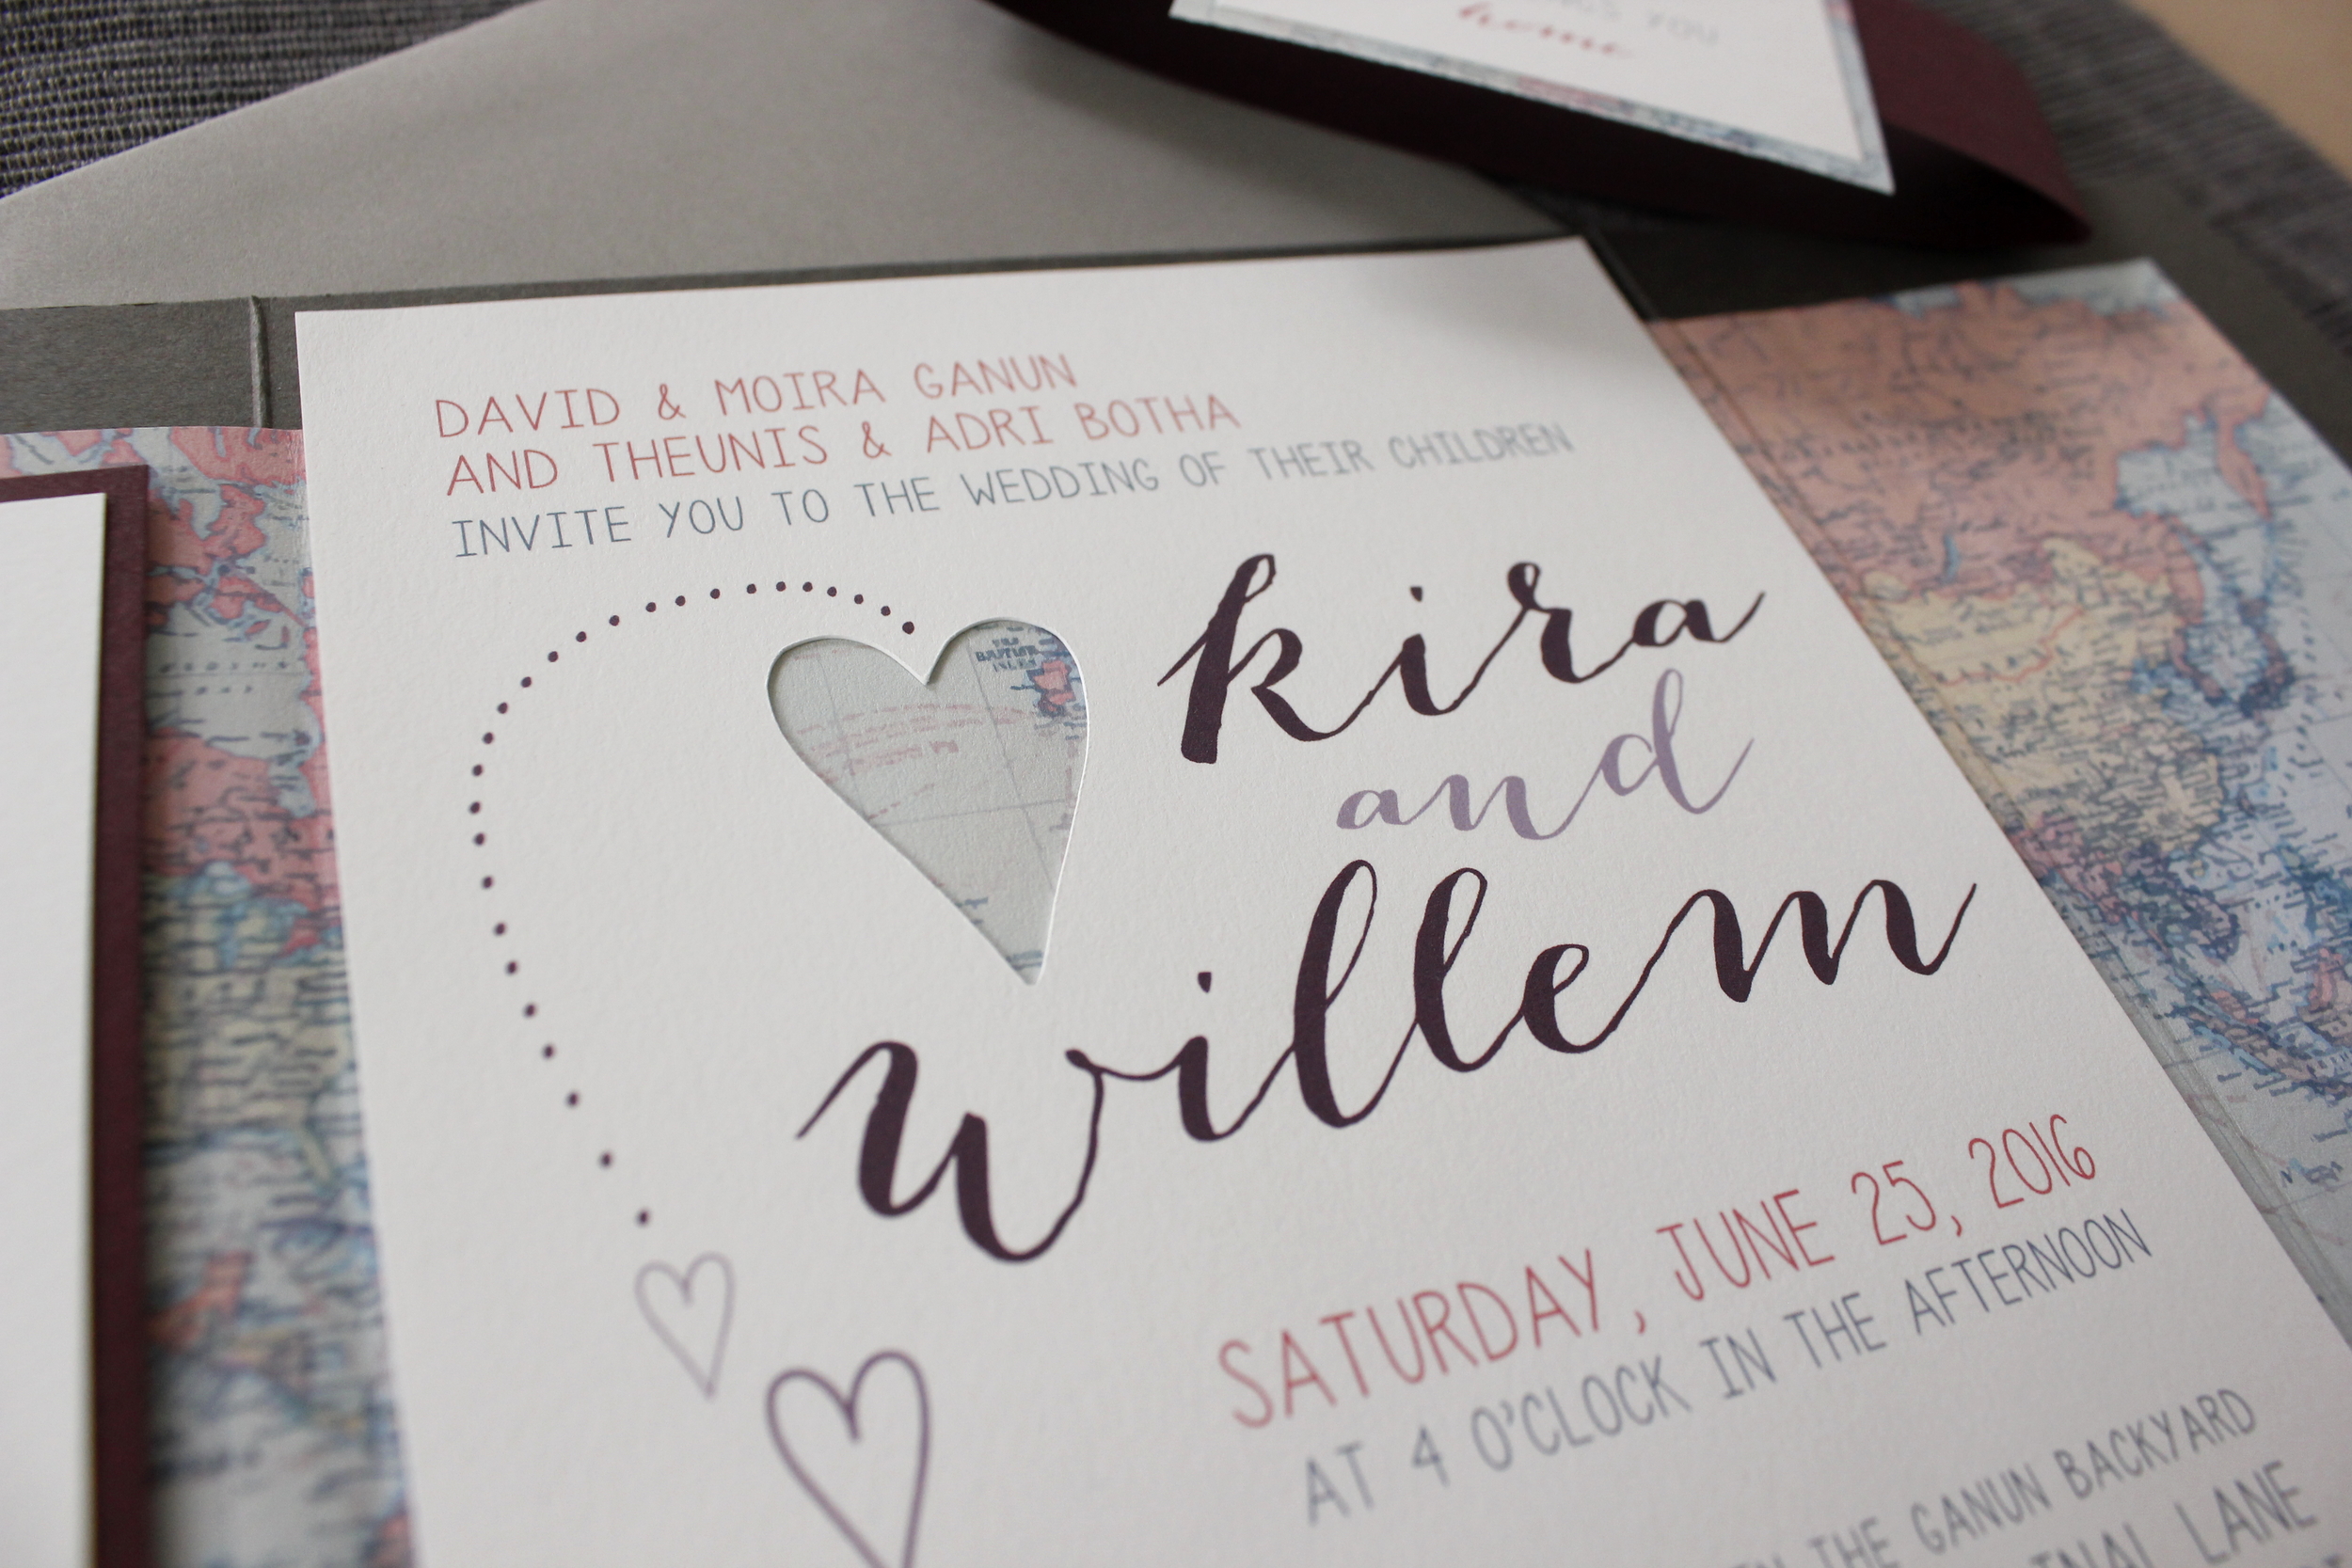
They ended up sticking with the heart design, and we switched to a vertical layered card for the RSVP to bring in some more purple. The online RSVP added convenience and dropped the cost a little, and I set them up with their own URL. The sash on the front was switched up for a purple band with a little of the map peaking out as a second layer. Fun fact: I was very careful to make the heart cut-out (yes, that was cut out of every single invitation!) over Scotland, where Kira's entire family went on vacation recently, and where Kira and Will share many fond memories.


5. The Accessories - For many of my clients, the invitation is just the beginning. As the wedding nears, there are other items that get added to the list -- welcome cards, menus, programs, favor tags, you name it. All these printed items can (and should, if you ask me!) be coordinated with your invitations. And the good news is, once the invitations have been finished, all the hard work and decision making has been done. The other pieces come together much more quickly because the design theme is already in place!
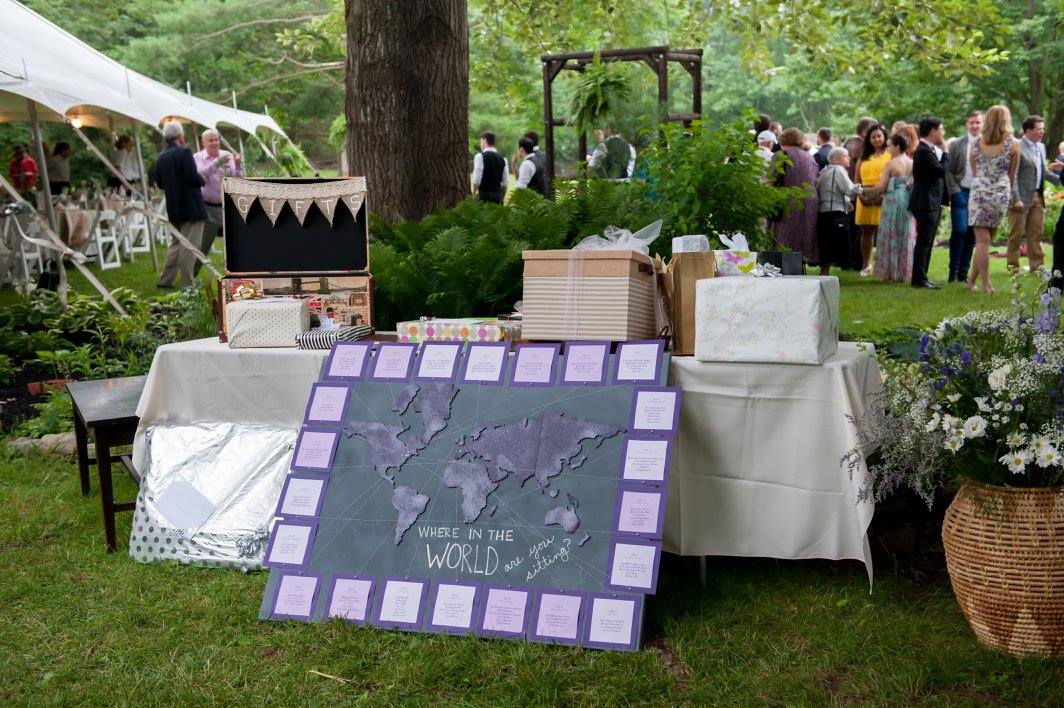
Turns out, Kira and Will have a plethora of talented friends, and Kira's pretty crafty herself. I was lucky enough to attend this wedding myself, and it was gorgeous, super comfortable and homey, and so personal. They carried the travel theme throughout the whole backyard, with a world map seating chart, and tables named after some of their favorite places in the world. We sat in London!

One of Kira's friends drew portraits of the bride and groom and the whole bridal party. Definitely one of the coolest ceremony programs I've ever seen!


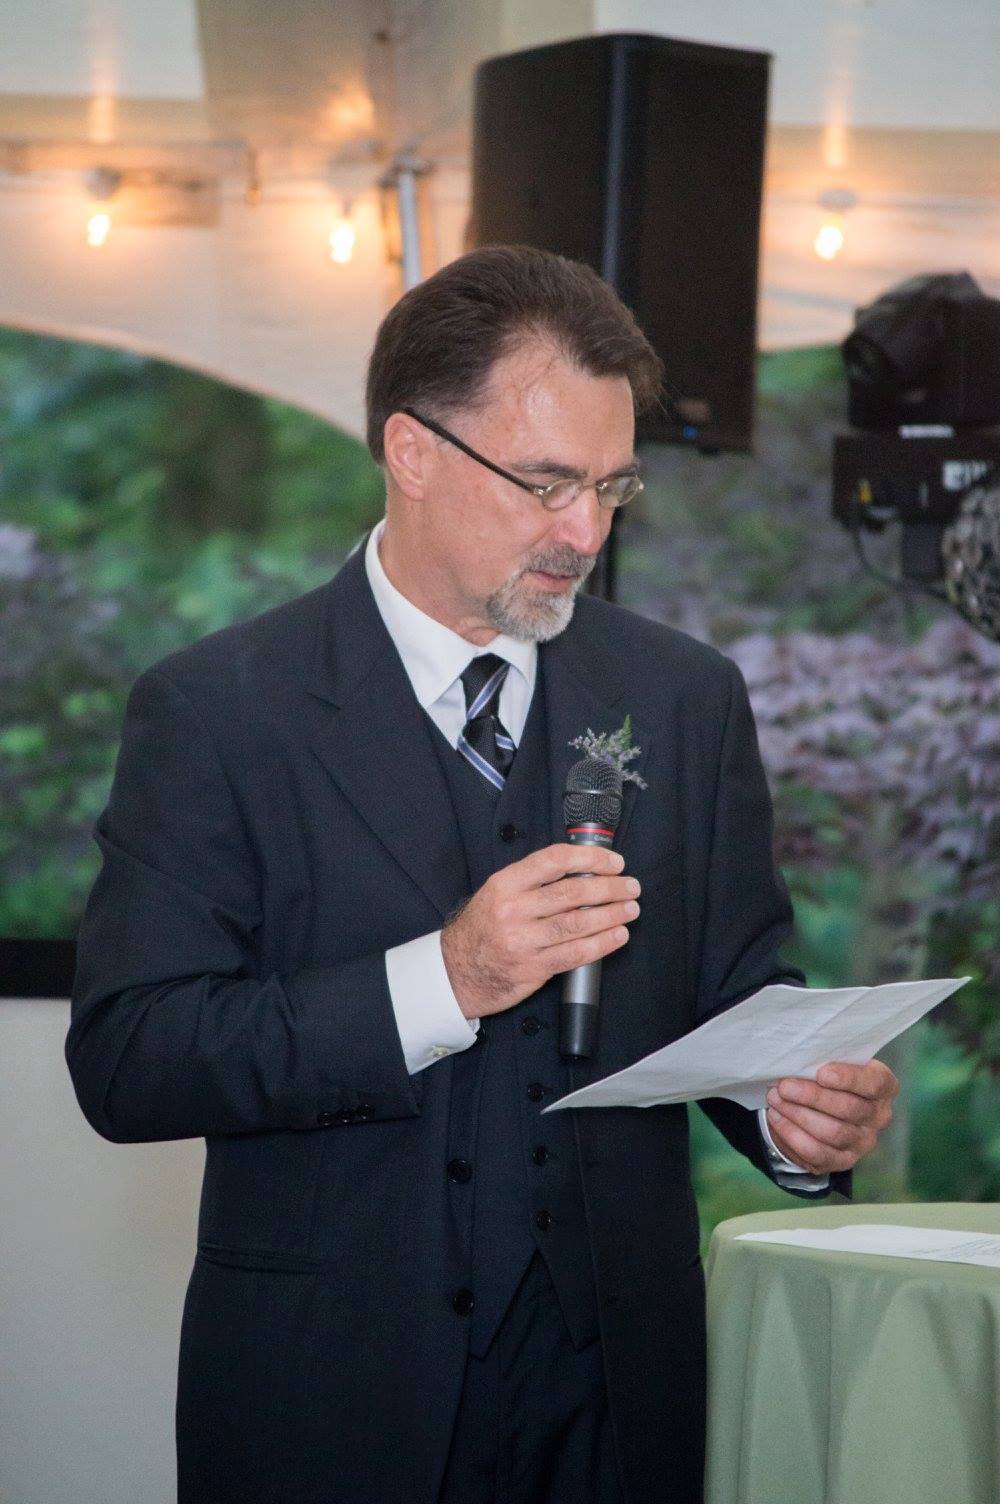 Will's Dad gave a toast at the wedding, and pulled out the invitation, bringing the whole experience full circle for everyone there. "Life brings you to unexpected places, Love brings you home." I got chills (and teary-eyed) and was reminded for the thousandth time why I love what I do!
This invitation, along with many others, is available on my Etsy shop!
Stay tuned for more Custom Design Process posts!
Wedding Photography by Melissa Mullins