The Anatomy of a Paper Rose

When my sister got married in 2013, she made her bridal bouquets out of tiny, tightly wrapped burlap and crepe paper roses. I thought they were the coolest thing ever, and that's really what inspired me to do paper flowers for my own wedding. As soon as I got engaged (ok, maybe a little before then, lets be honest) I started going a little crazy on Pinterest, pinning my favorite real and paper bouquets for inspiration. In my searching, I discovered liagriffith.com, a blog with literally every template, printable and tutorial you can imagine (actually makes this blog post sort of pointless, but people keep asking me how I do it, so I'll keep going!) I started out using her templates and after some practice, made some tweaks and adjusted the pattern to make two sizes of roses. It used to take me 20 minutes to put together one rose; now I can do 10-12 an hour (depending on how intense the episode of SVU is that's playing in the background). Practice, practice, practice. I'd never have been able to incorporate this into my business making 1 rose every 20 minutes, and I certainly wouldn't have outfitted my whole wedding, all the while staying sane enough to keep my groom :).
1. Collect Your Materials
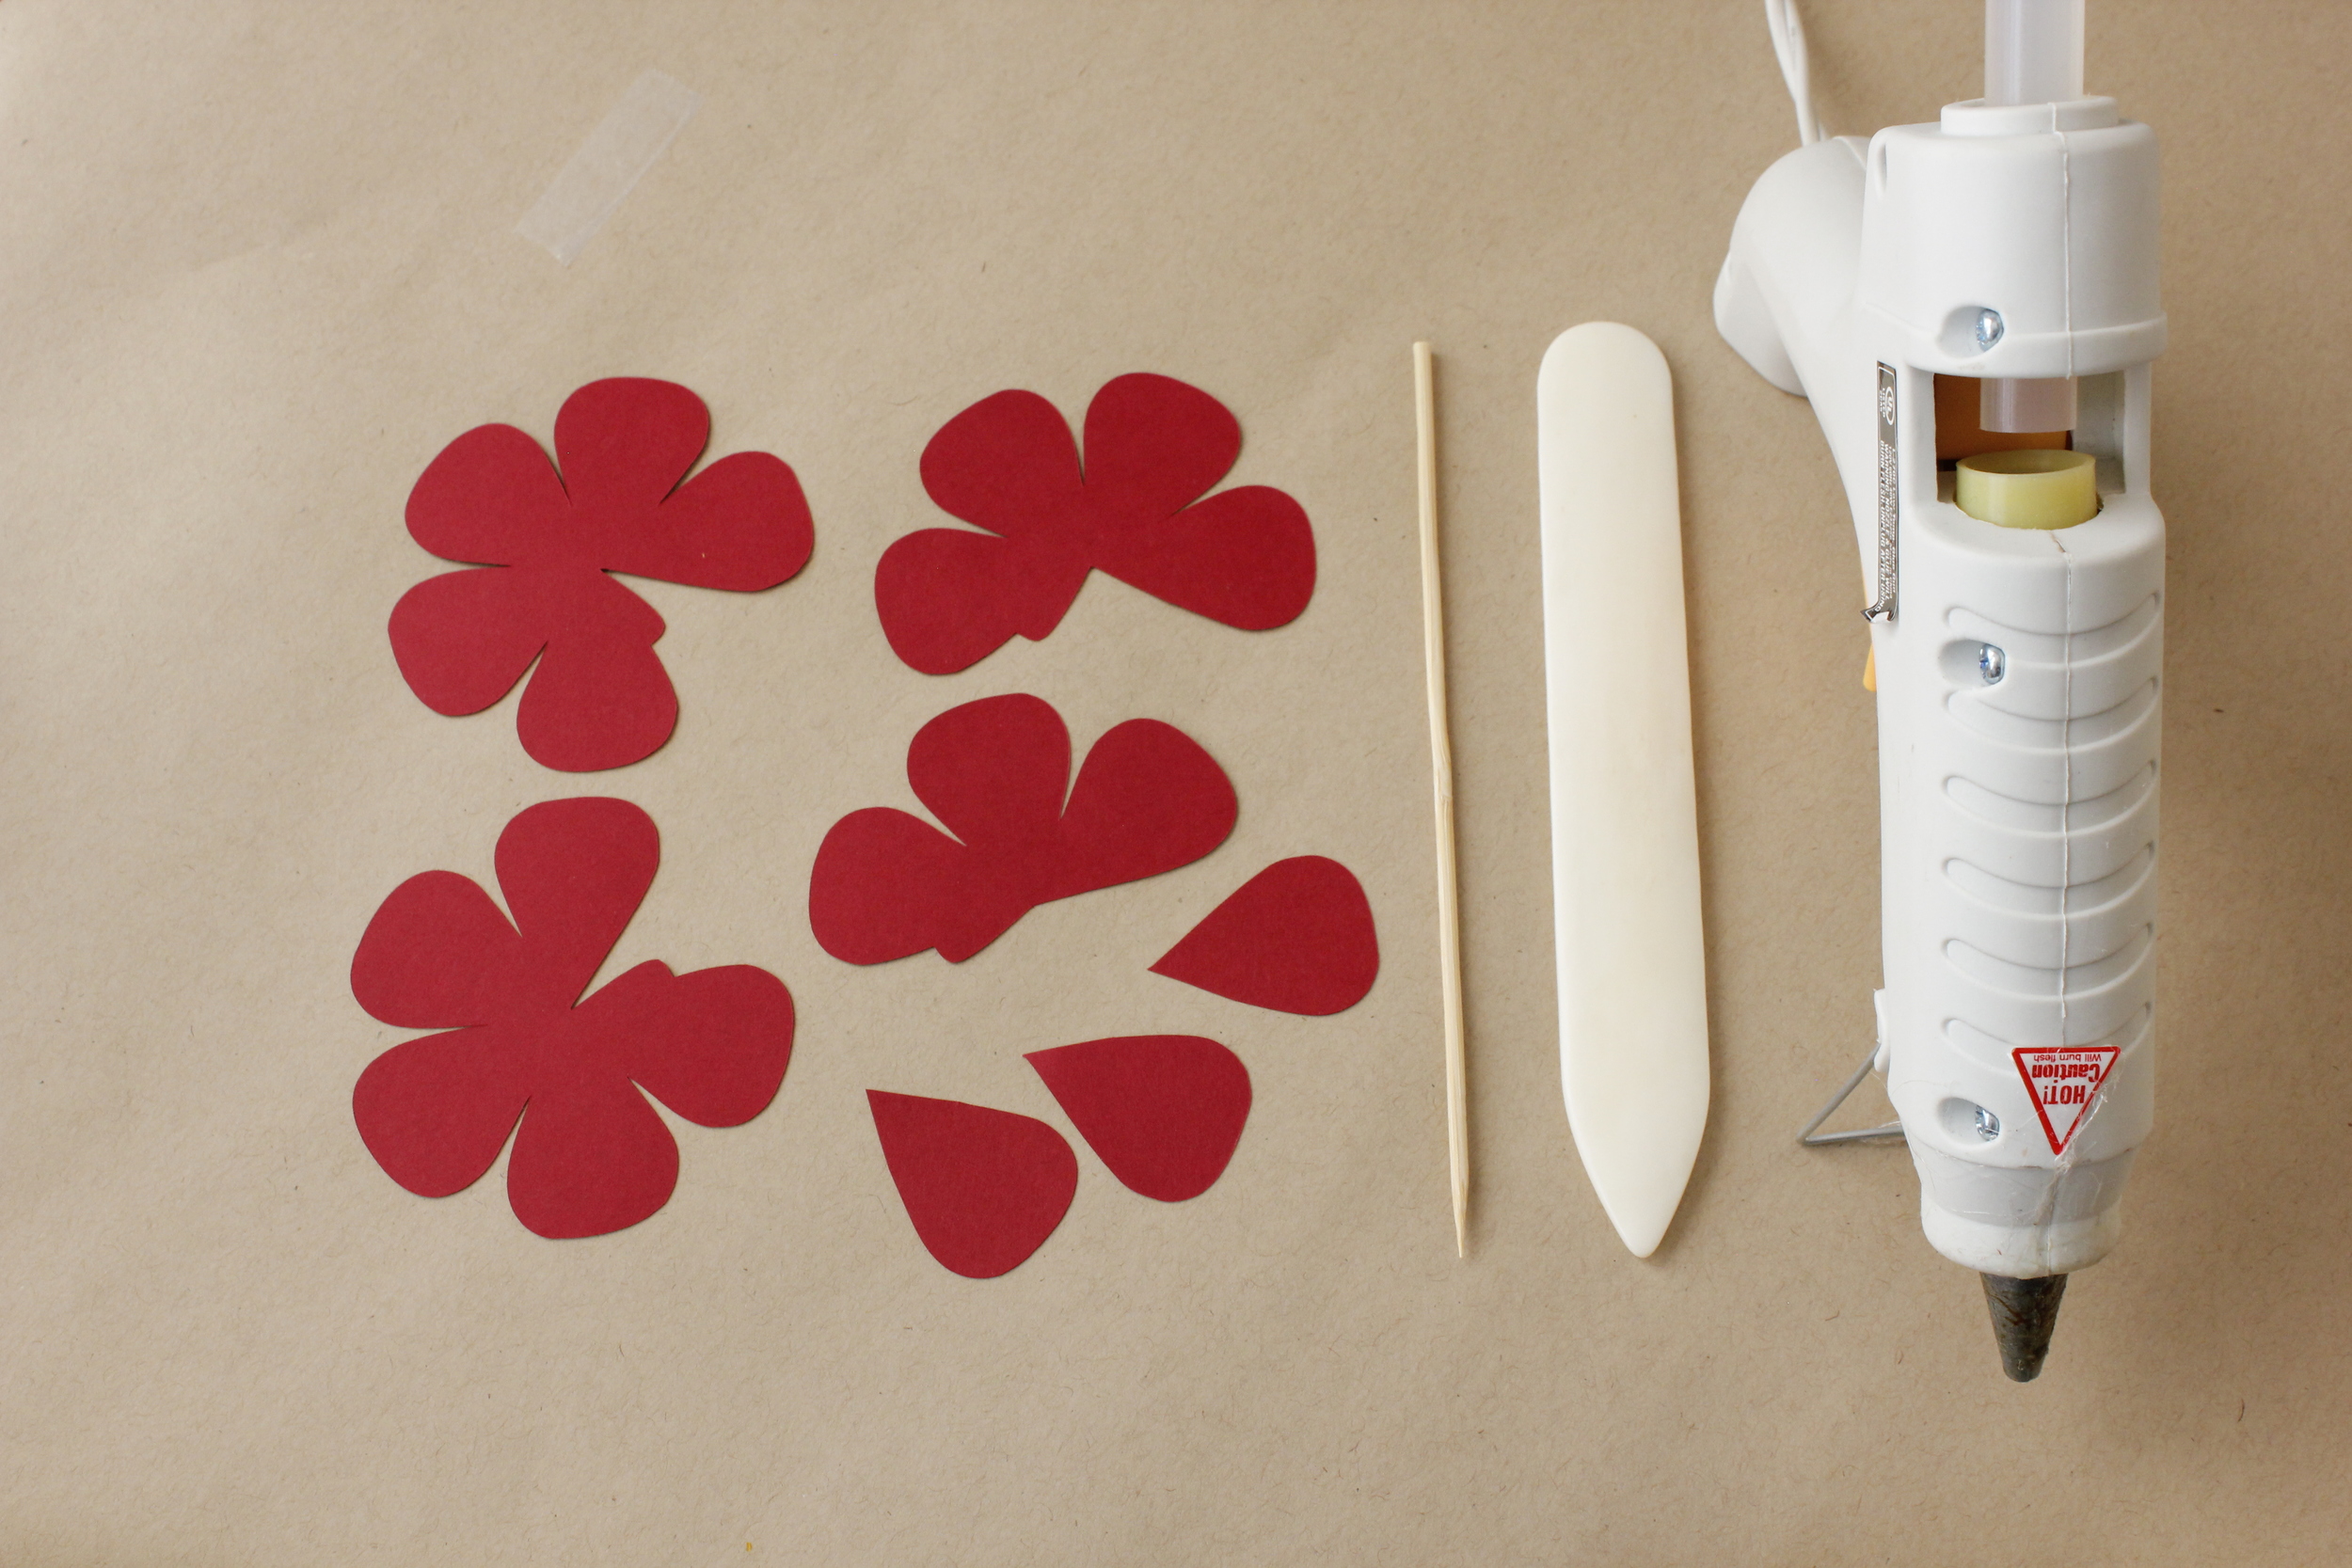
- The petals are cut from text-weight 8 1/2 x 11 paper in whatever color I want, from Paper Source. The paper is very important. It needs to be light enough to curl beautifully, but heavy enough to be nice and sturdy once the bouquet is assembled. Paper Source also has awesome colors.
- The bamboo skewer is found at most grocery stores, and is very inexpensive. I buy mine at the most expensive grocery store in St Louis (it's right next to our favorite butcher counter, and I just grab them while I'm waiting), and a pack of 100 is still under $3. They come in many sizes, so the length you want just depends on how you're going to use the roses. For bridal bouquets and the arrangement in this post, I used 6 inch skewers. These skewers were something I added to the whole flower making process. Most tutorials instruct you to use floral wire, but I find that not only difficult to work with, but also very flimsy in the final bouquet. My bouquets are rock solid (you'll thank me on your wedding day when you don't have to adjust wires all day!).
- The bone folder is made from bone and polished smooth. I have three different "bone" folders -- a plastic one that came with my Martha Stewart score board which I hardly ever use, a teflon-coated one that's great for scoring my Passport wedding invitations, and this genuine bone folder I use for petal curling. The genuine bone folder is by far the best one for flower making, and you will find all kinds of other uses for it.
- The glue gun is a standard high-heat glue gun you can buy at any craft store. I recommend high-heat (even though you need to be careful and have tough fingers) because the low heat glue dries too fast for this process.
2. Prep the Petals.

Once the petals are cut and ready to go, I curl each corner with the bone folder. I find it easiest to use the rounded end of the bone folder. Hold the inside of the petal and curl the paper away from you, like you're curling ribbon. I curl each corner so each petal makes a little triangle.

Once the petals are curled, I put together the center of the rose. Using the single petals, I apply a squiggle of hit glue and wrap them around skewer one by one, layering them on top of each other and allowing the curled edges to splay out. *Make sure you use the end of the skewer without the point!*


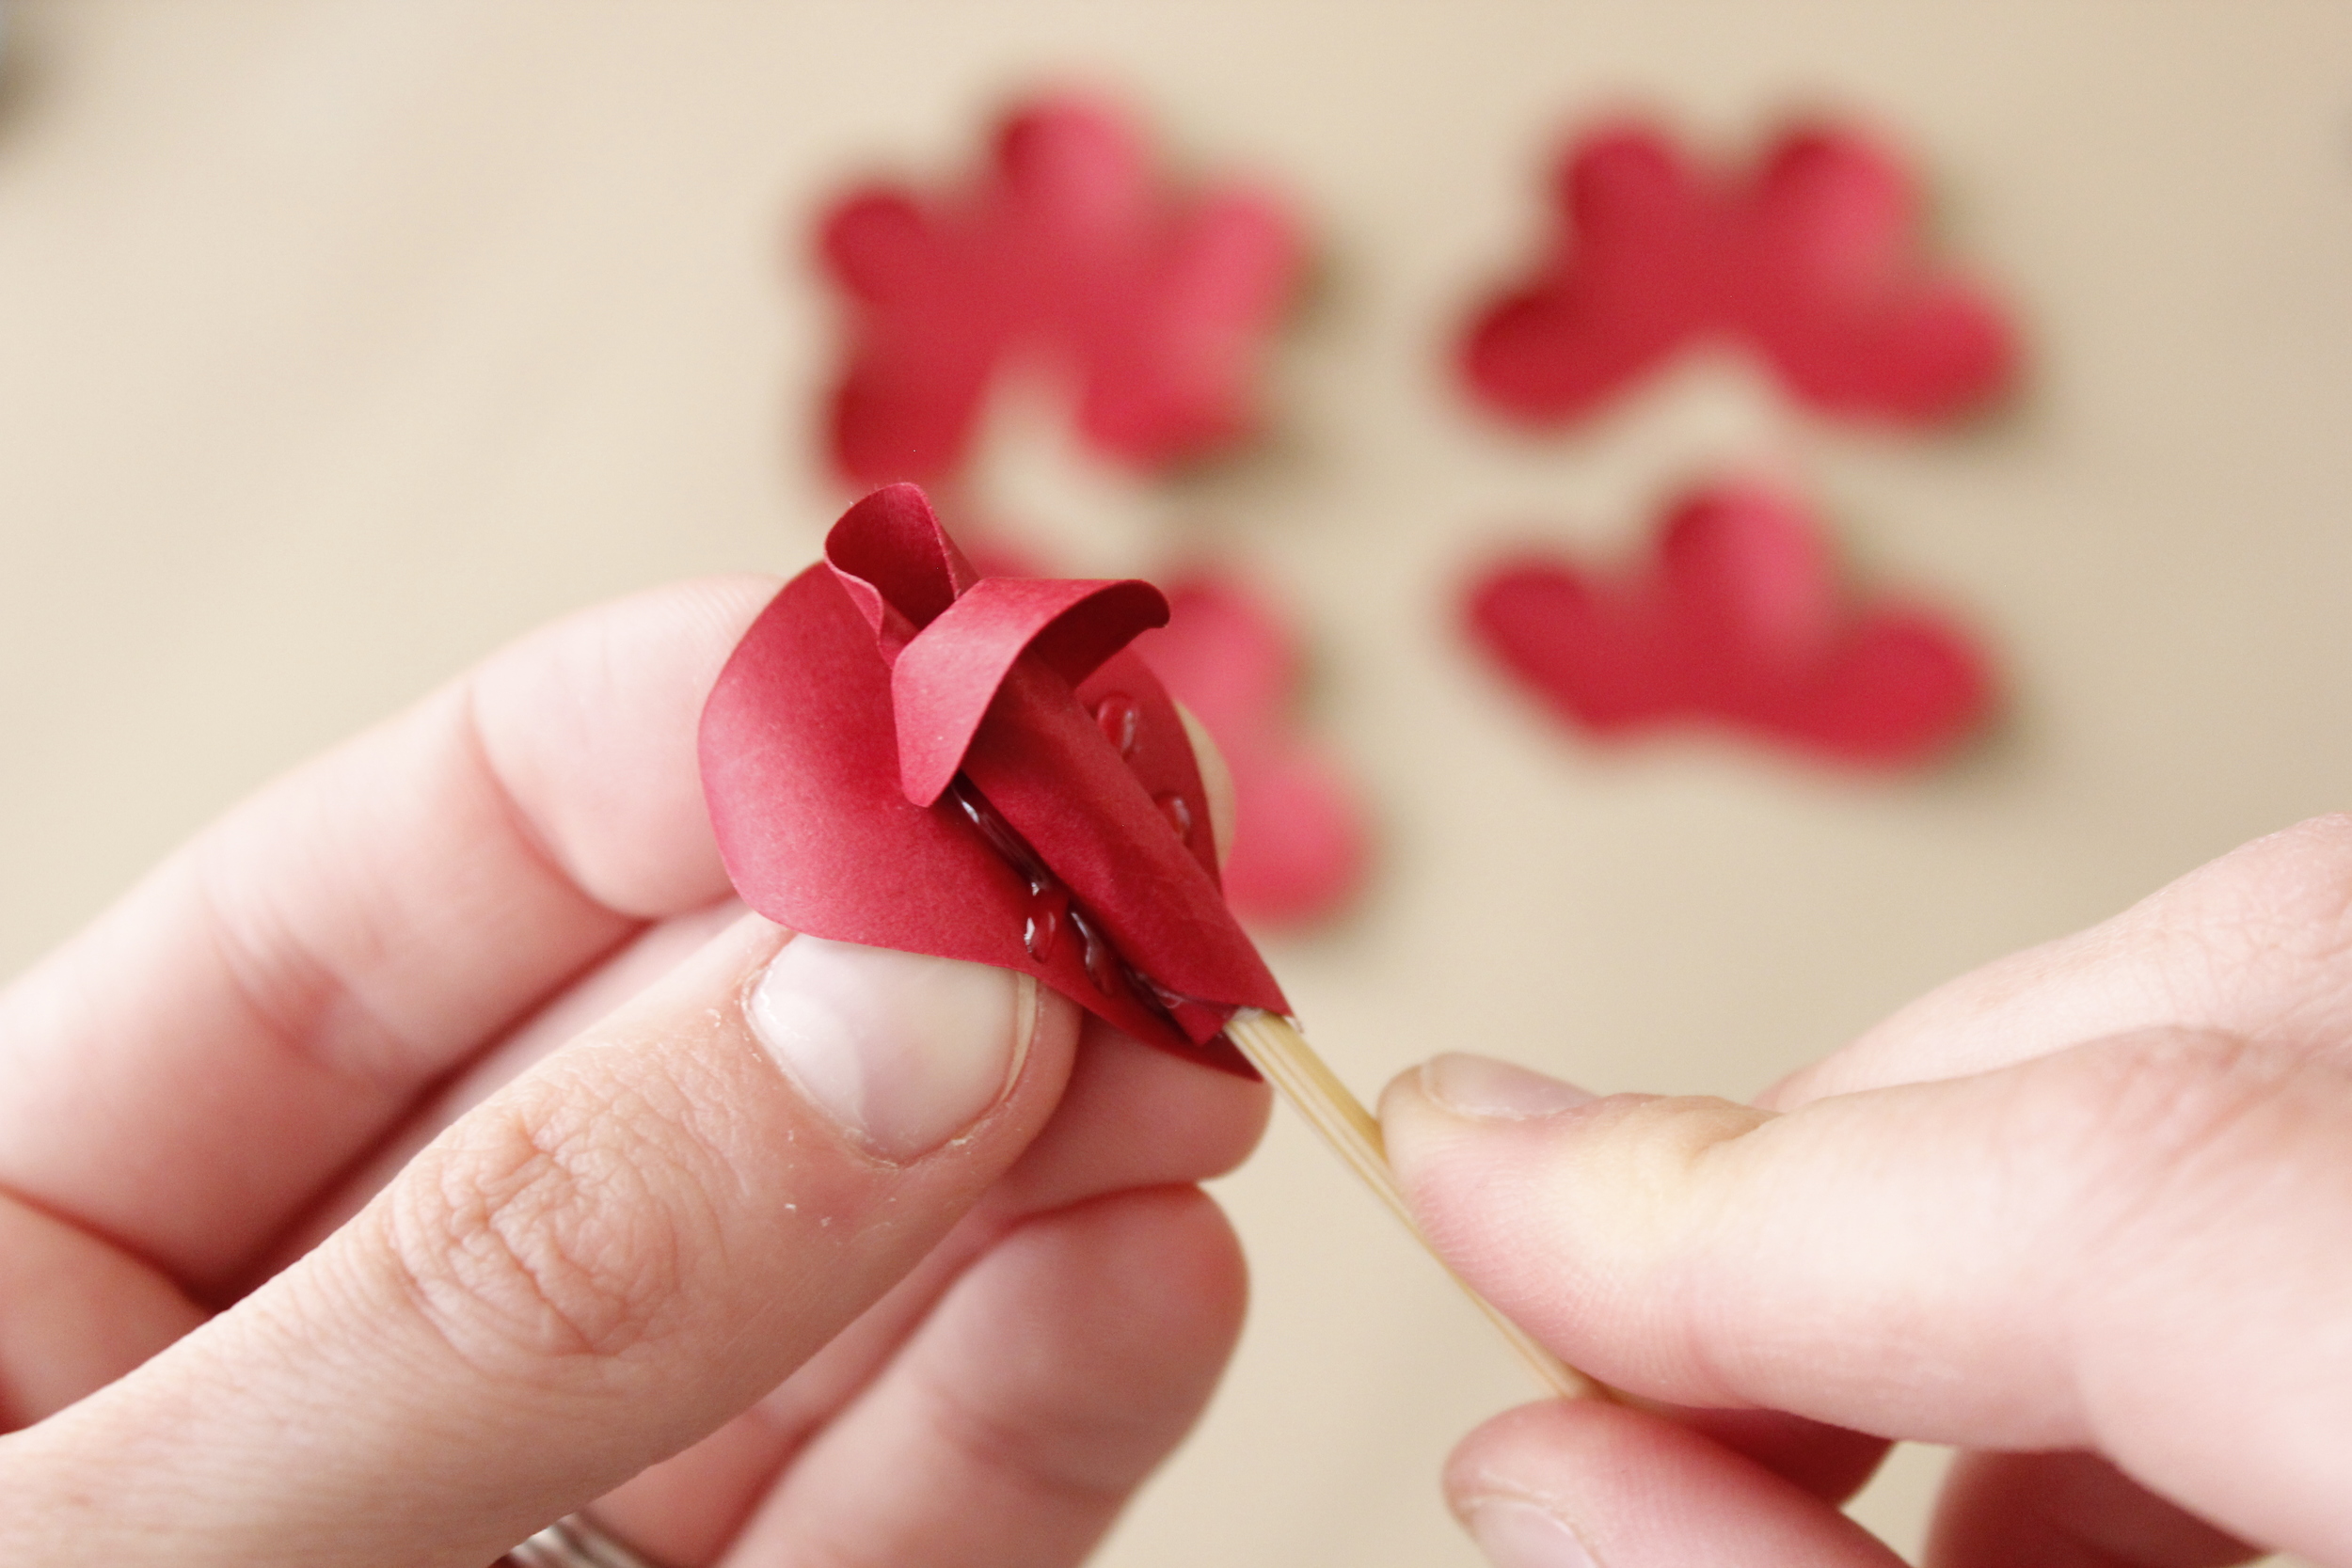
Now I glue the little tabs on the larger petals to themselves, creating little cones.


3. Assembly
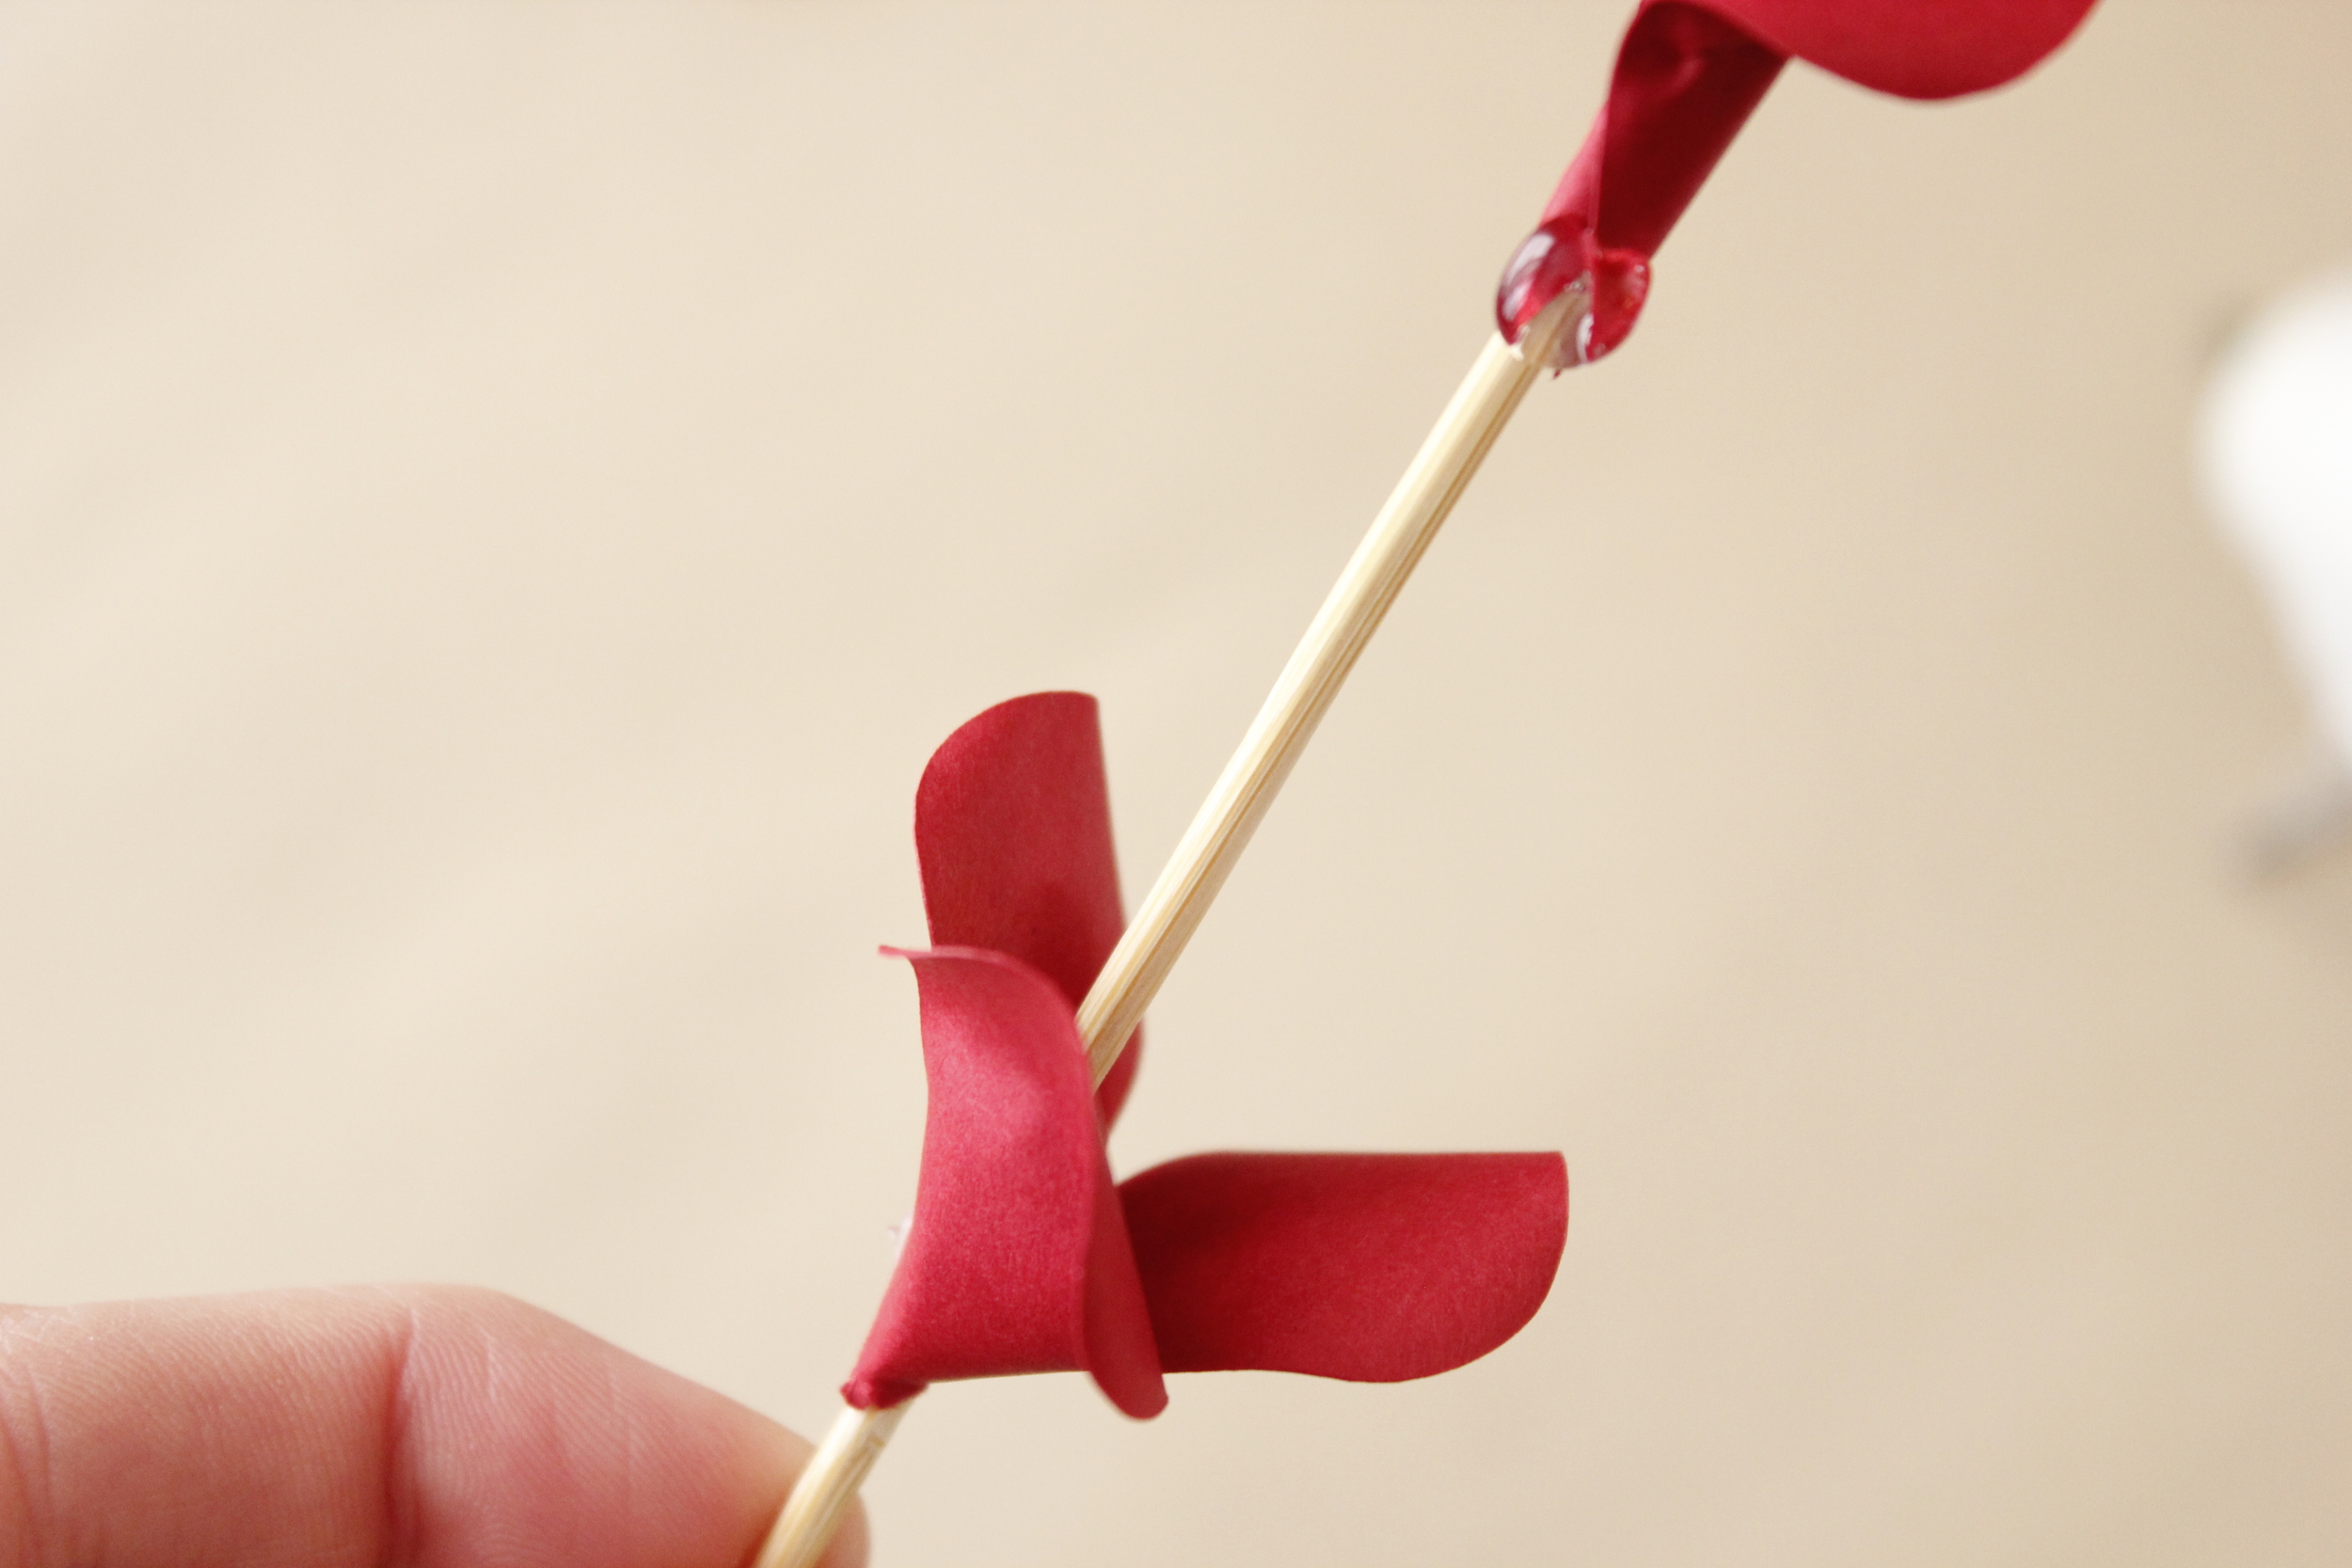
Once the cones are put together, I finish assembling the flower. I put a small dot of glue on the bottom of the petals already on the skewer and poke the pointy end of the skewer through the center of each set of petals.
I stack them one under the next, alternating the petals so there are no gaps, until all petals are assembled.


If you want a different look (or if you want to add dimension to a bouquet of these roses) you can switch up the way you glue the tabbed petals together. By just turning the petals upside down (so the petals curl in instead of out) you get a very different looking rose:
You can choose to just alternate one layer of petals like this, or all of them. For the one shown above, the center is done with petals curled out, the next three layers are curled in, and the final layer is curled out. This is also a great place to use another color for a layer or two. Play around a little with it! What's your favorite?
For this bouquet, I used a mix of large and small roses, some curled in and some curled out, and I incorporated a second color in just a few petals. I love how it turned out!
![_MG_1648[1]](http://static1.squarespace.com/static/5612e4dde4b0b9b281e9597a/5612e574e4b0eb177eab2086/5612e583e4b0eb177eab249f/1444078979909/mg_16481.jpg?format=original)
How about two dozen roses for your Valentine that won't wilt in a week? Use the code VAL15 for 15% off your floral order! Order yours today!