The Custom Design Process: Jen & Andy
 This is the first in what will be a series of posts that will take you through my custom design process for wedding invitations. I find it so fascinating, once a design is finished and the invitations have been printed and mailed, to go back in my files and look at the very first draft for my client. Because most of my proofing process is digital, I have files saved in my email and on my computer from every single step of the way. Some designs are very close at the first draft, and the final design isn't too far removed, but others start out SO far from how they finish. If you've ever wondered what the process can be like, here you go!
Jen & Andy
This is the first in what will be a series of posts that will take you through my custom design process for wedding invitations. I find it so fascinating, once a design is finished and the invitations have been printed and mailed, to go back in my files and look at the very first draft for my client. Because most of my proofing process is digital, I have files saved in my email and on my computer from every single step of the way. Some designs are very close at the first draft, and the final design isn't too far removed, but others start out SO far from how they finish. If you've ever wondered what the process can be like, here you go!
Jen & Andy
I featured Jen & Andy's wedding invitation back in January when I wrote about my favorite invitations from 2014, but I didn't go into too much detail about the process. Here goes!
1. Inquiry- The first step in the process is for the client to reach out and start the conversation about what s/he is looking for in an invitation. Sometimes this includes sharing Pinterest inspiration, color choices, and general feel. And sometimes, it's a big fat "I have NO idea."
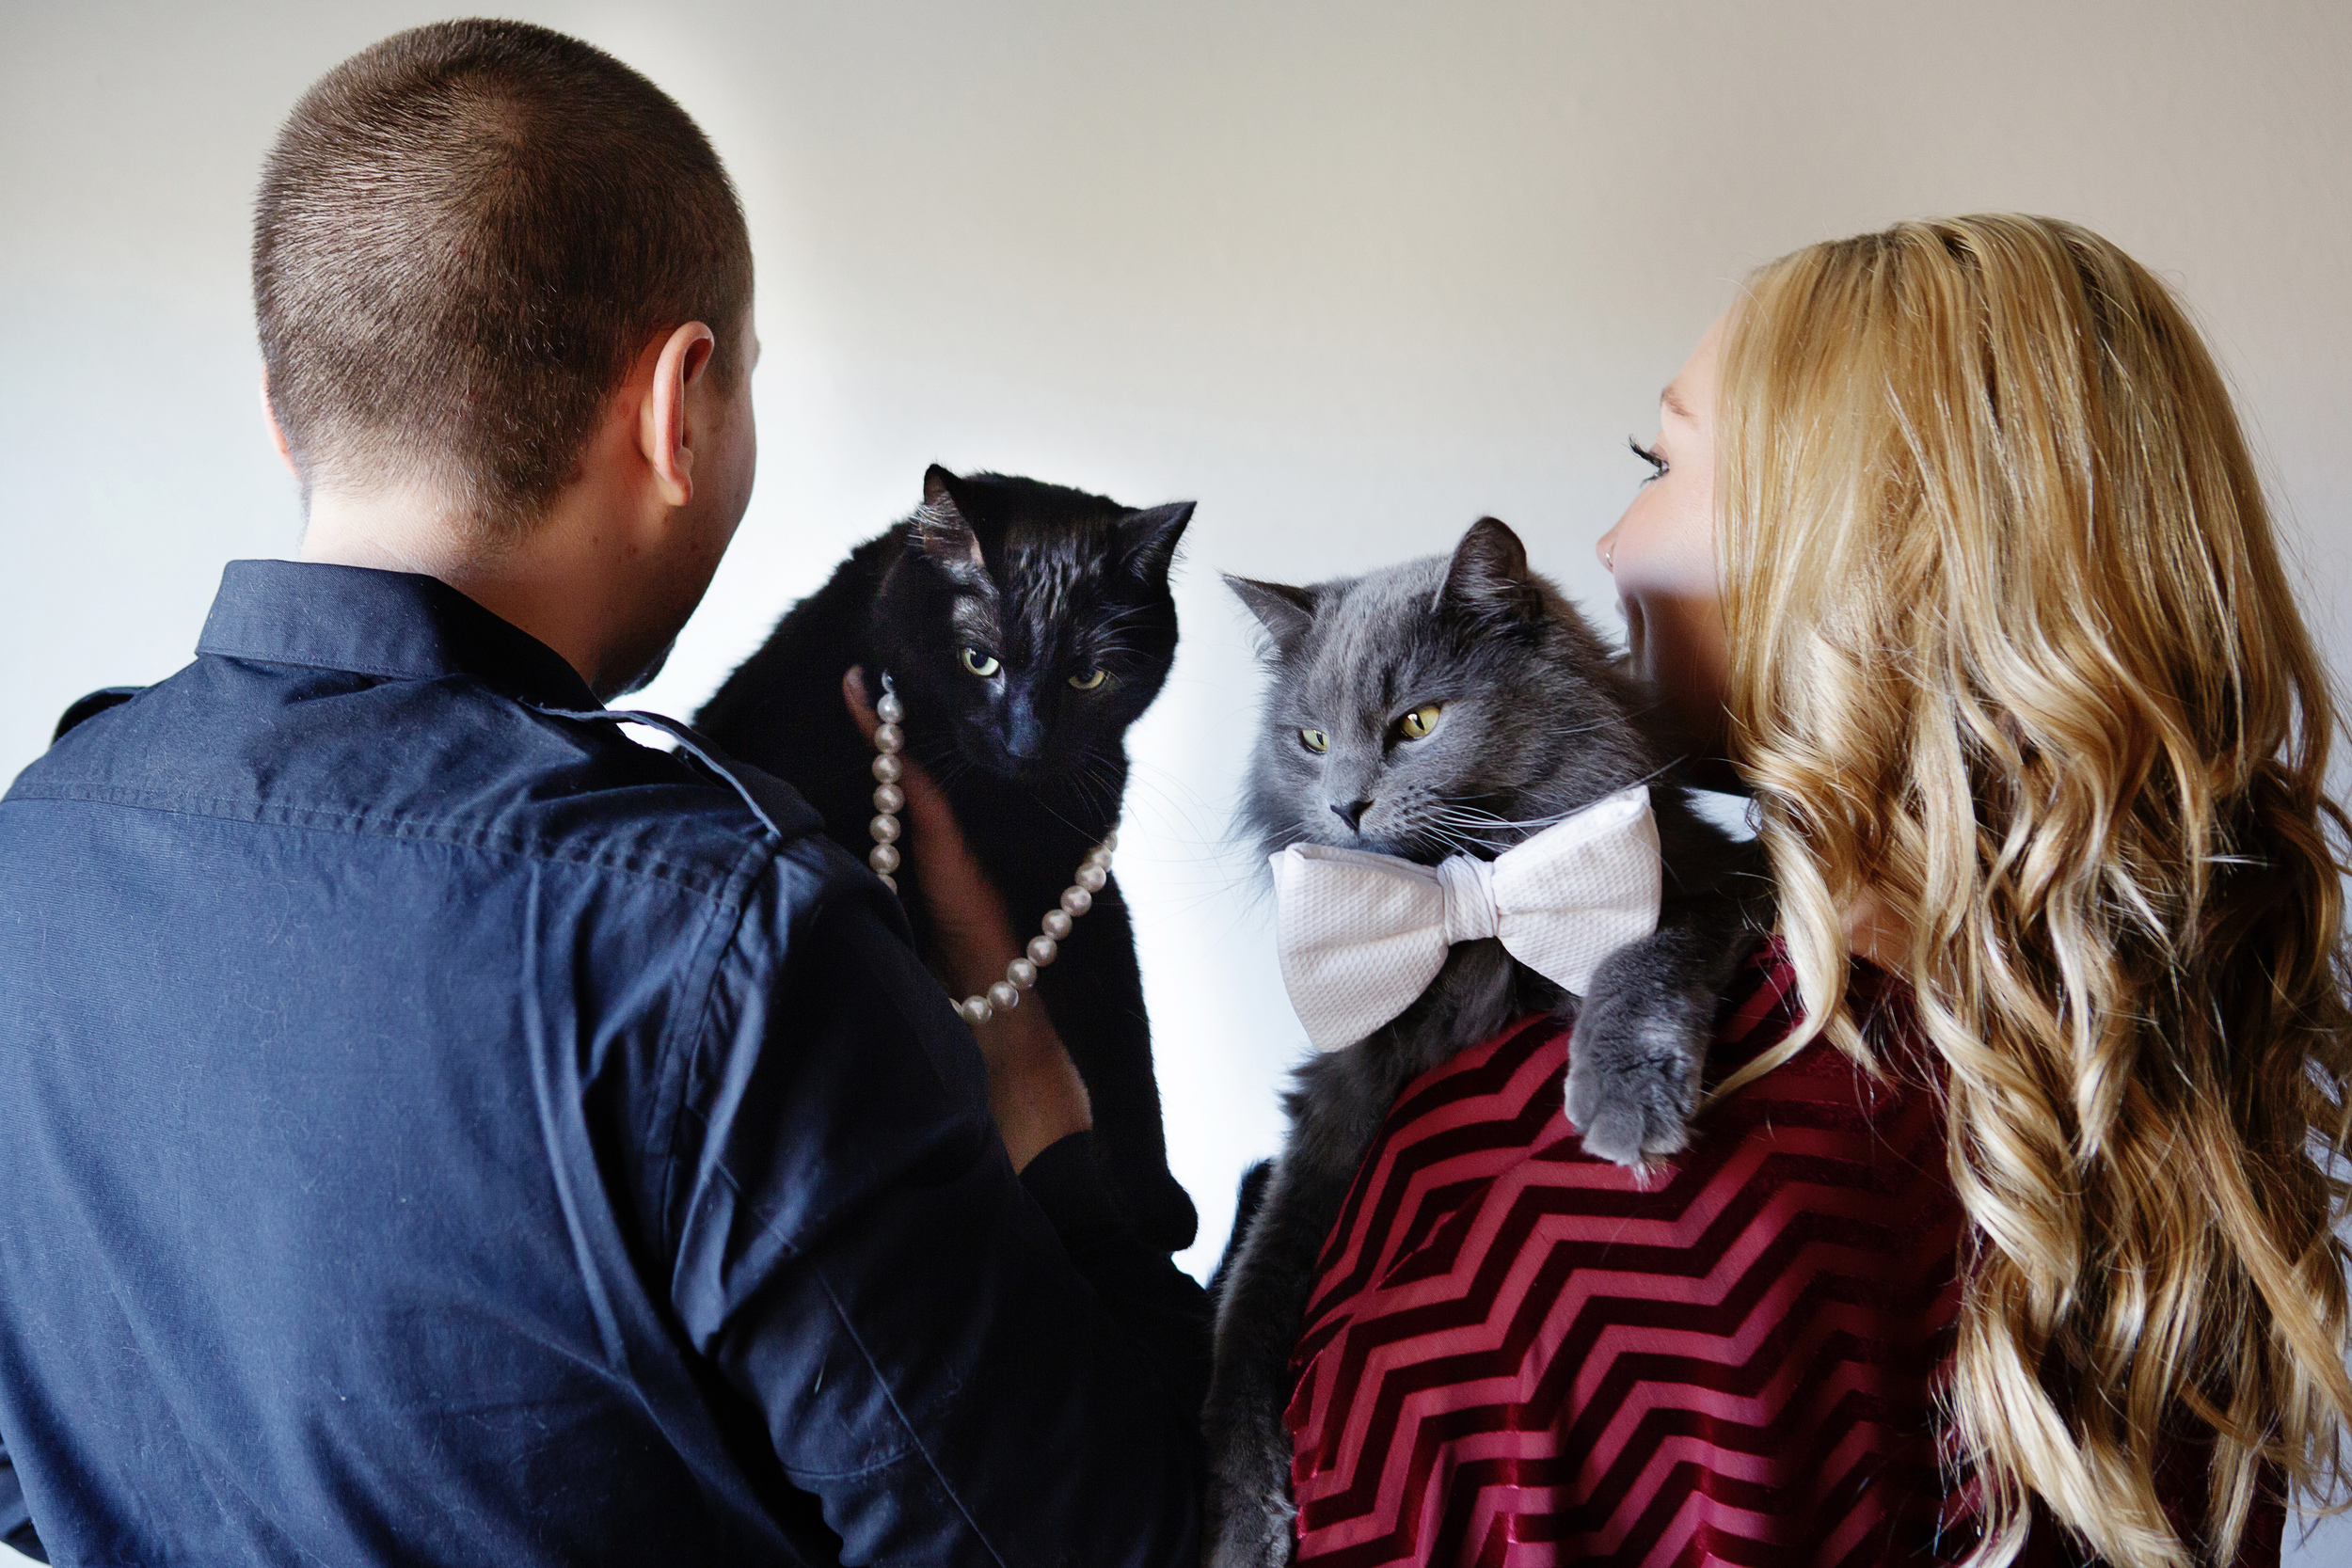
Jen and I have known each other our whole lives, and she was getting married at the vacation spot where we met. It's a beautiful lakeside setting in New Hampshire, at a family camp that's been there for almost 100 years. To start, Jen said, "when I look for inspiration on Pinterest i tend to go with pictures associated with words like gypsy, modern hippie, boho". She told me her colors would be grays with pops of red. She also said she trusted me to come up with something...


2. First Looks - The next step is for me to start drafting up some samples based on the ideas the couple provided. I generally provide three First Looks.
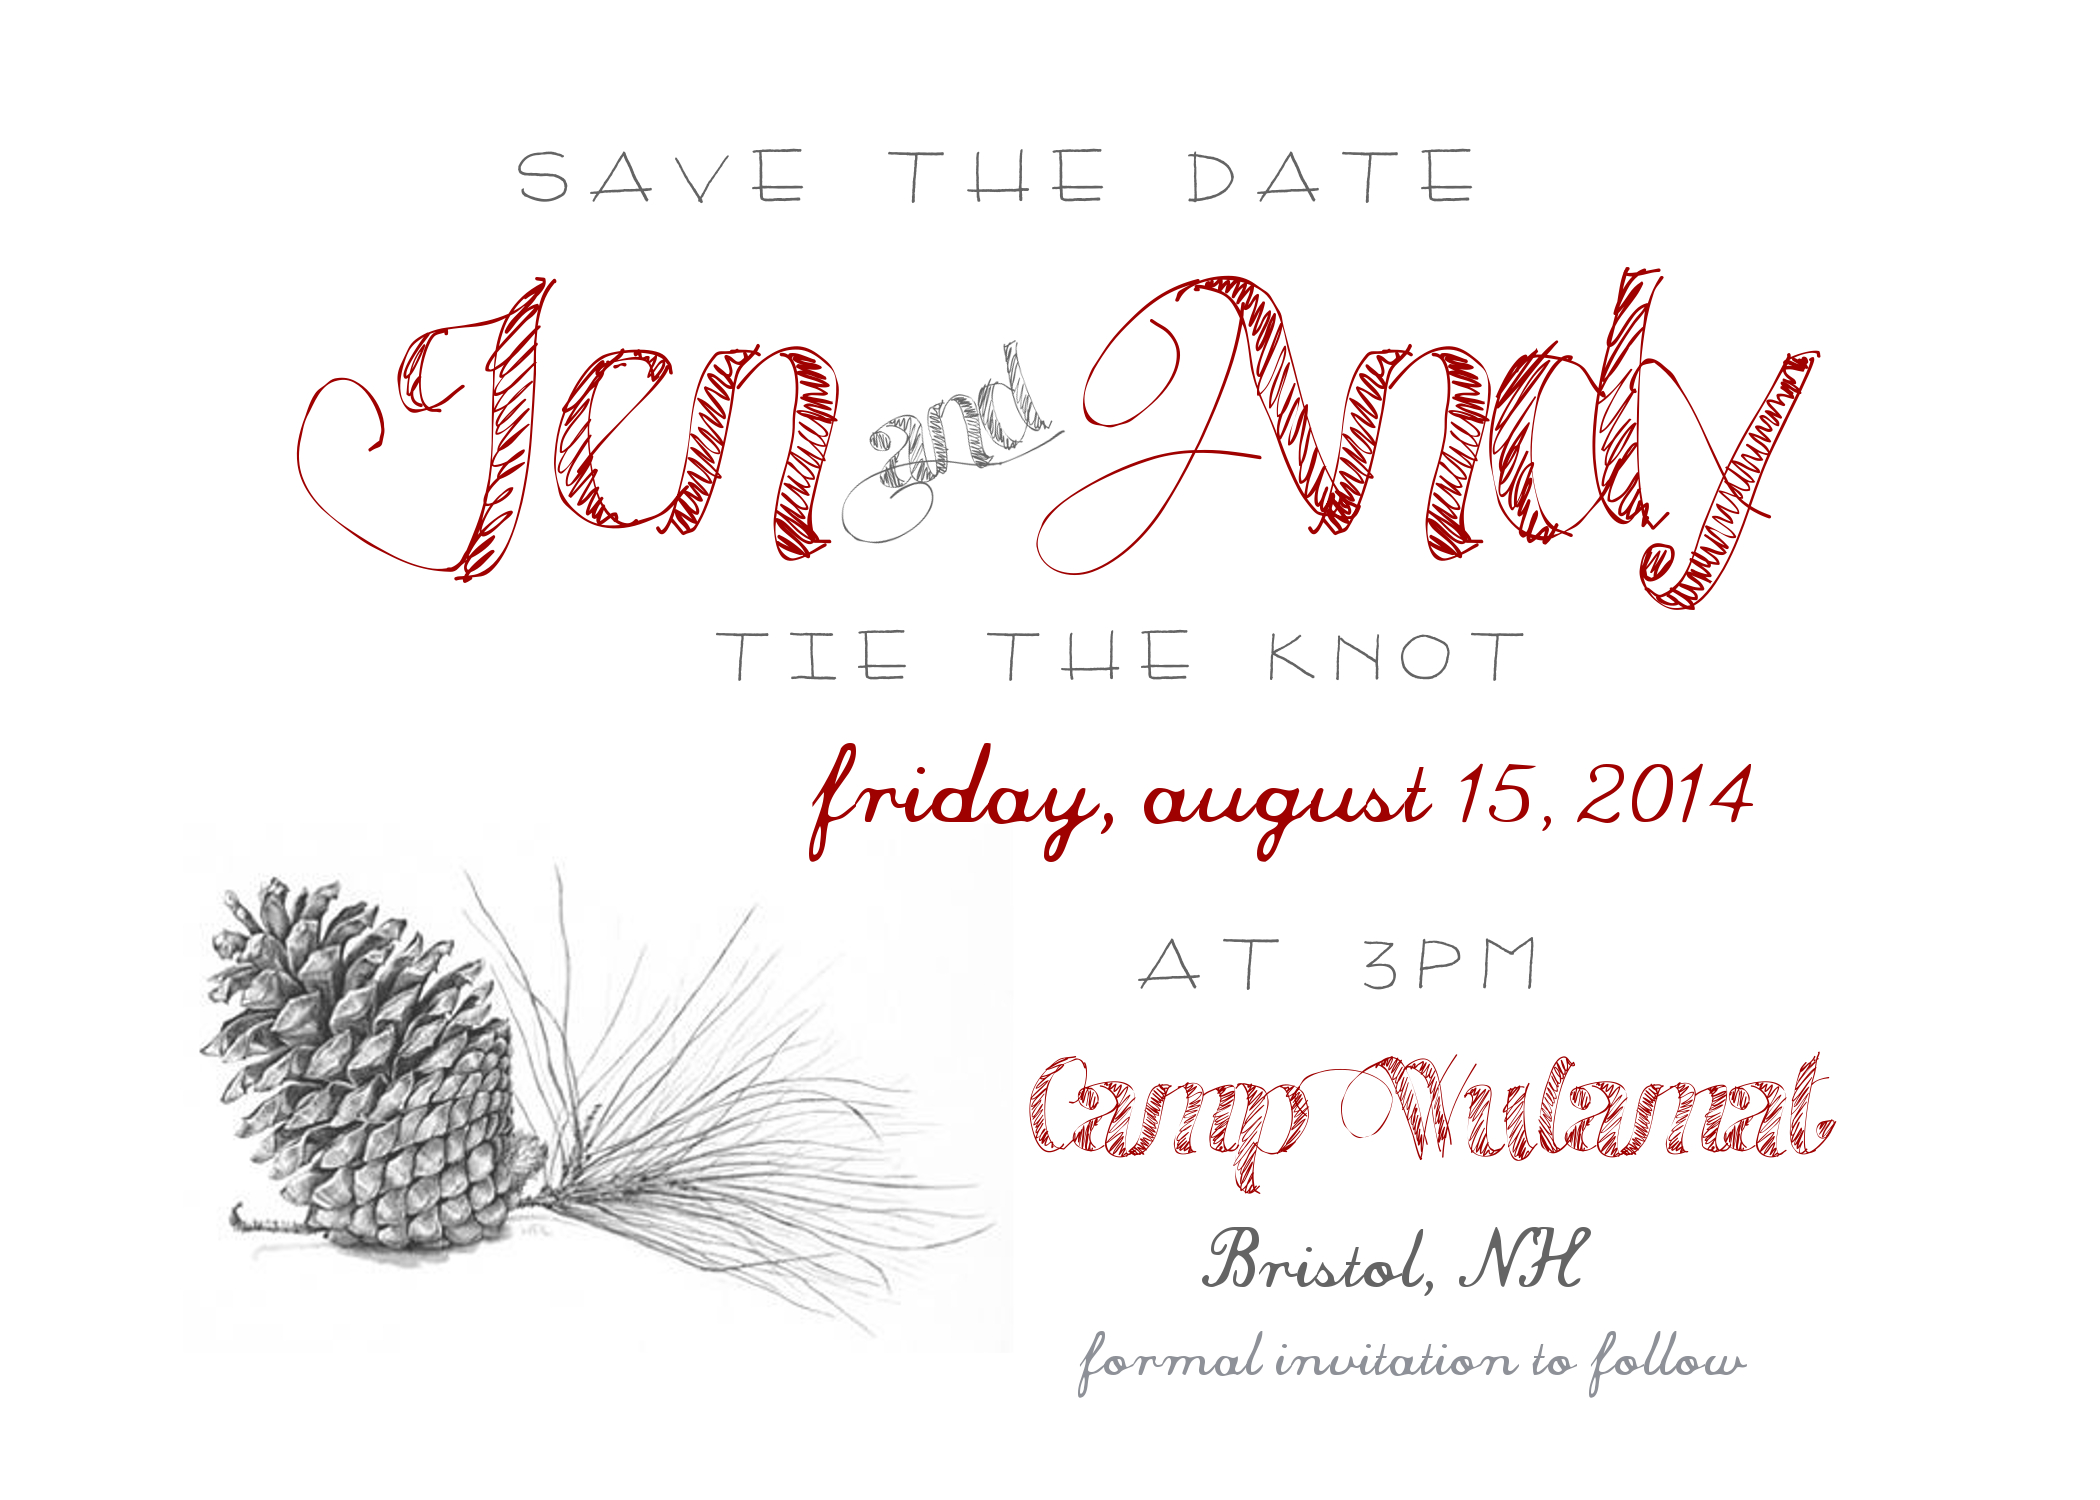
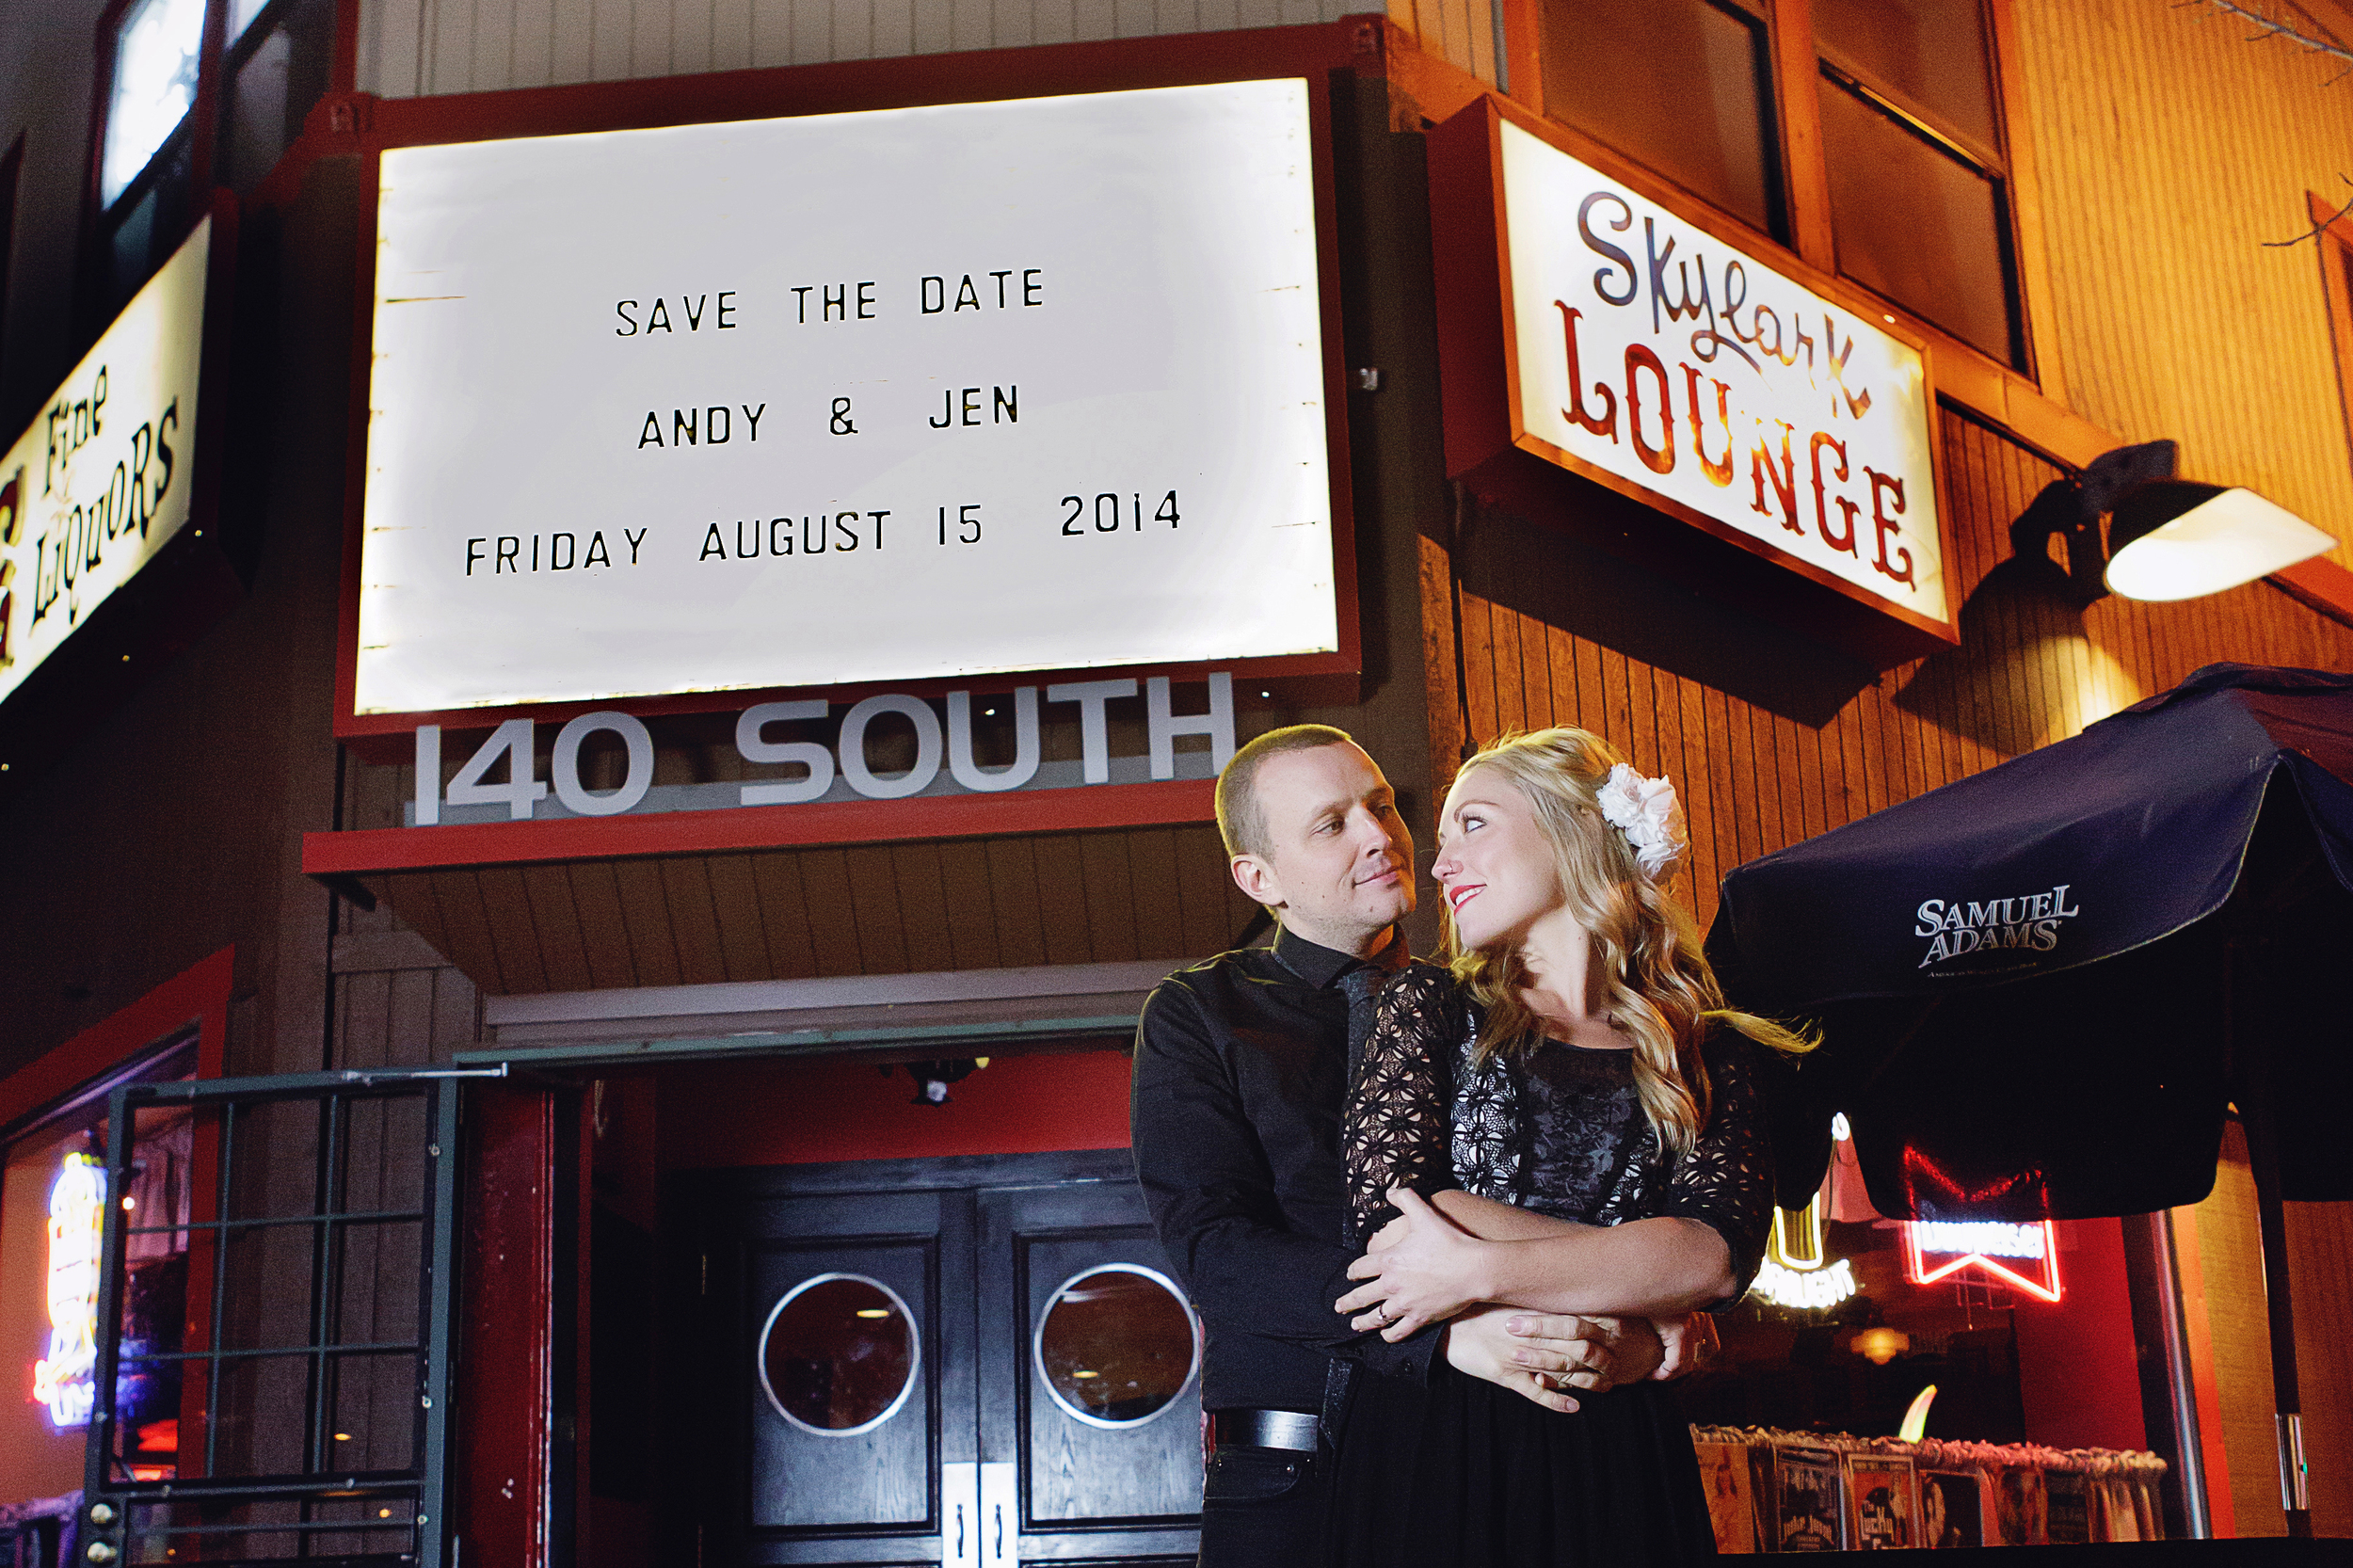
For Jen and Andy, I created three drafts of a Save the Date to start. This was going to be a destination wedding for their friends and family, and the original plan was to send out a Save the Date way ahead of time that would include lodging information, etc. and follow with a formal invitation later. Jen said she liked the pine trees, and liked the whimsical script font, but was picturing a brighter red. She also said they had just had engagement photos taken (by Heather Fairley Photography in Denver). They were hoping to use a shot or two for the invites, so I waited a few weeks to see those before the second round of drafts went out.
3. Honing in - The next step is for me to create another set of proofs based on elements from the First Looks that the client wants to see more of -- which fonts they like, which layout is best, and which color combination they prefer.
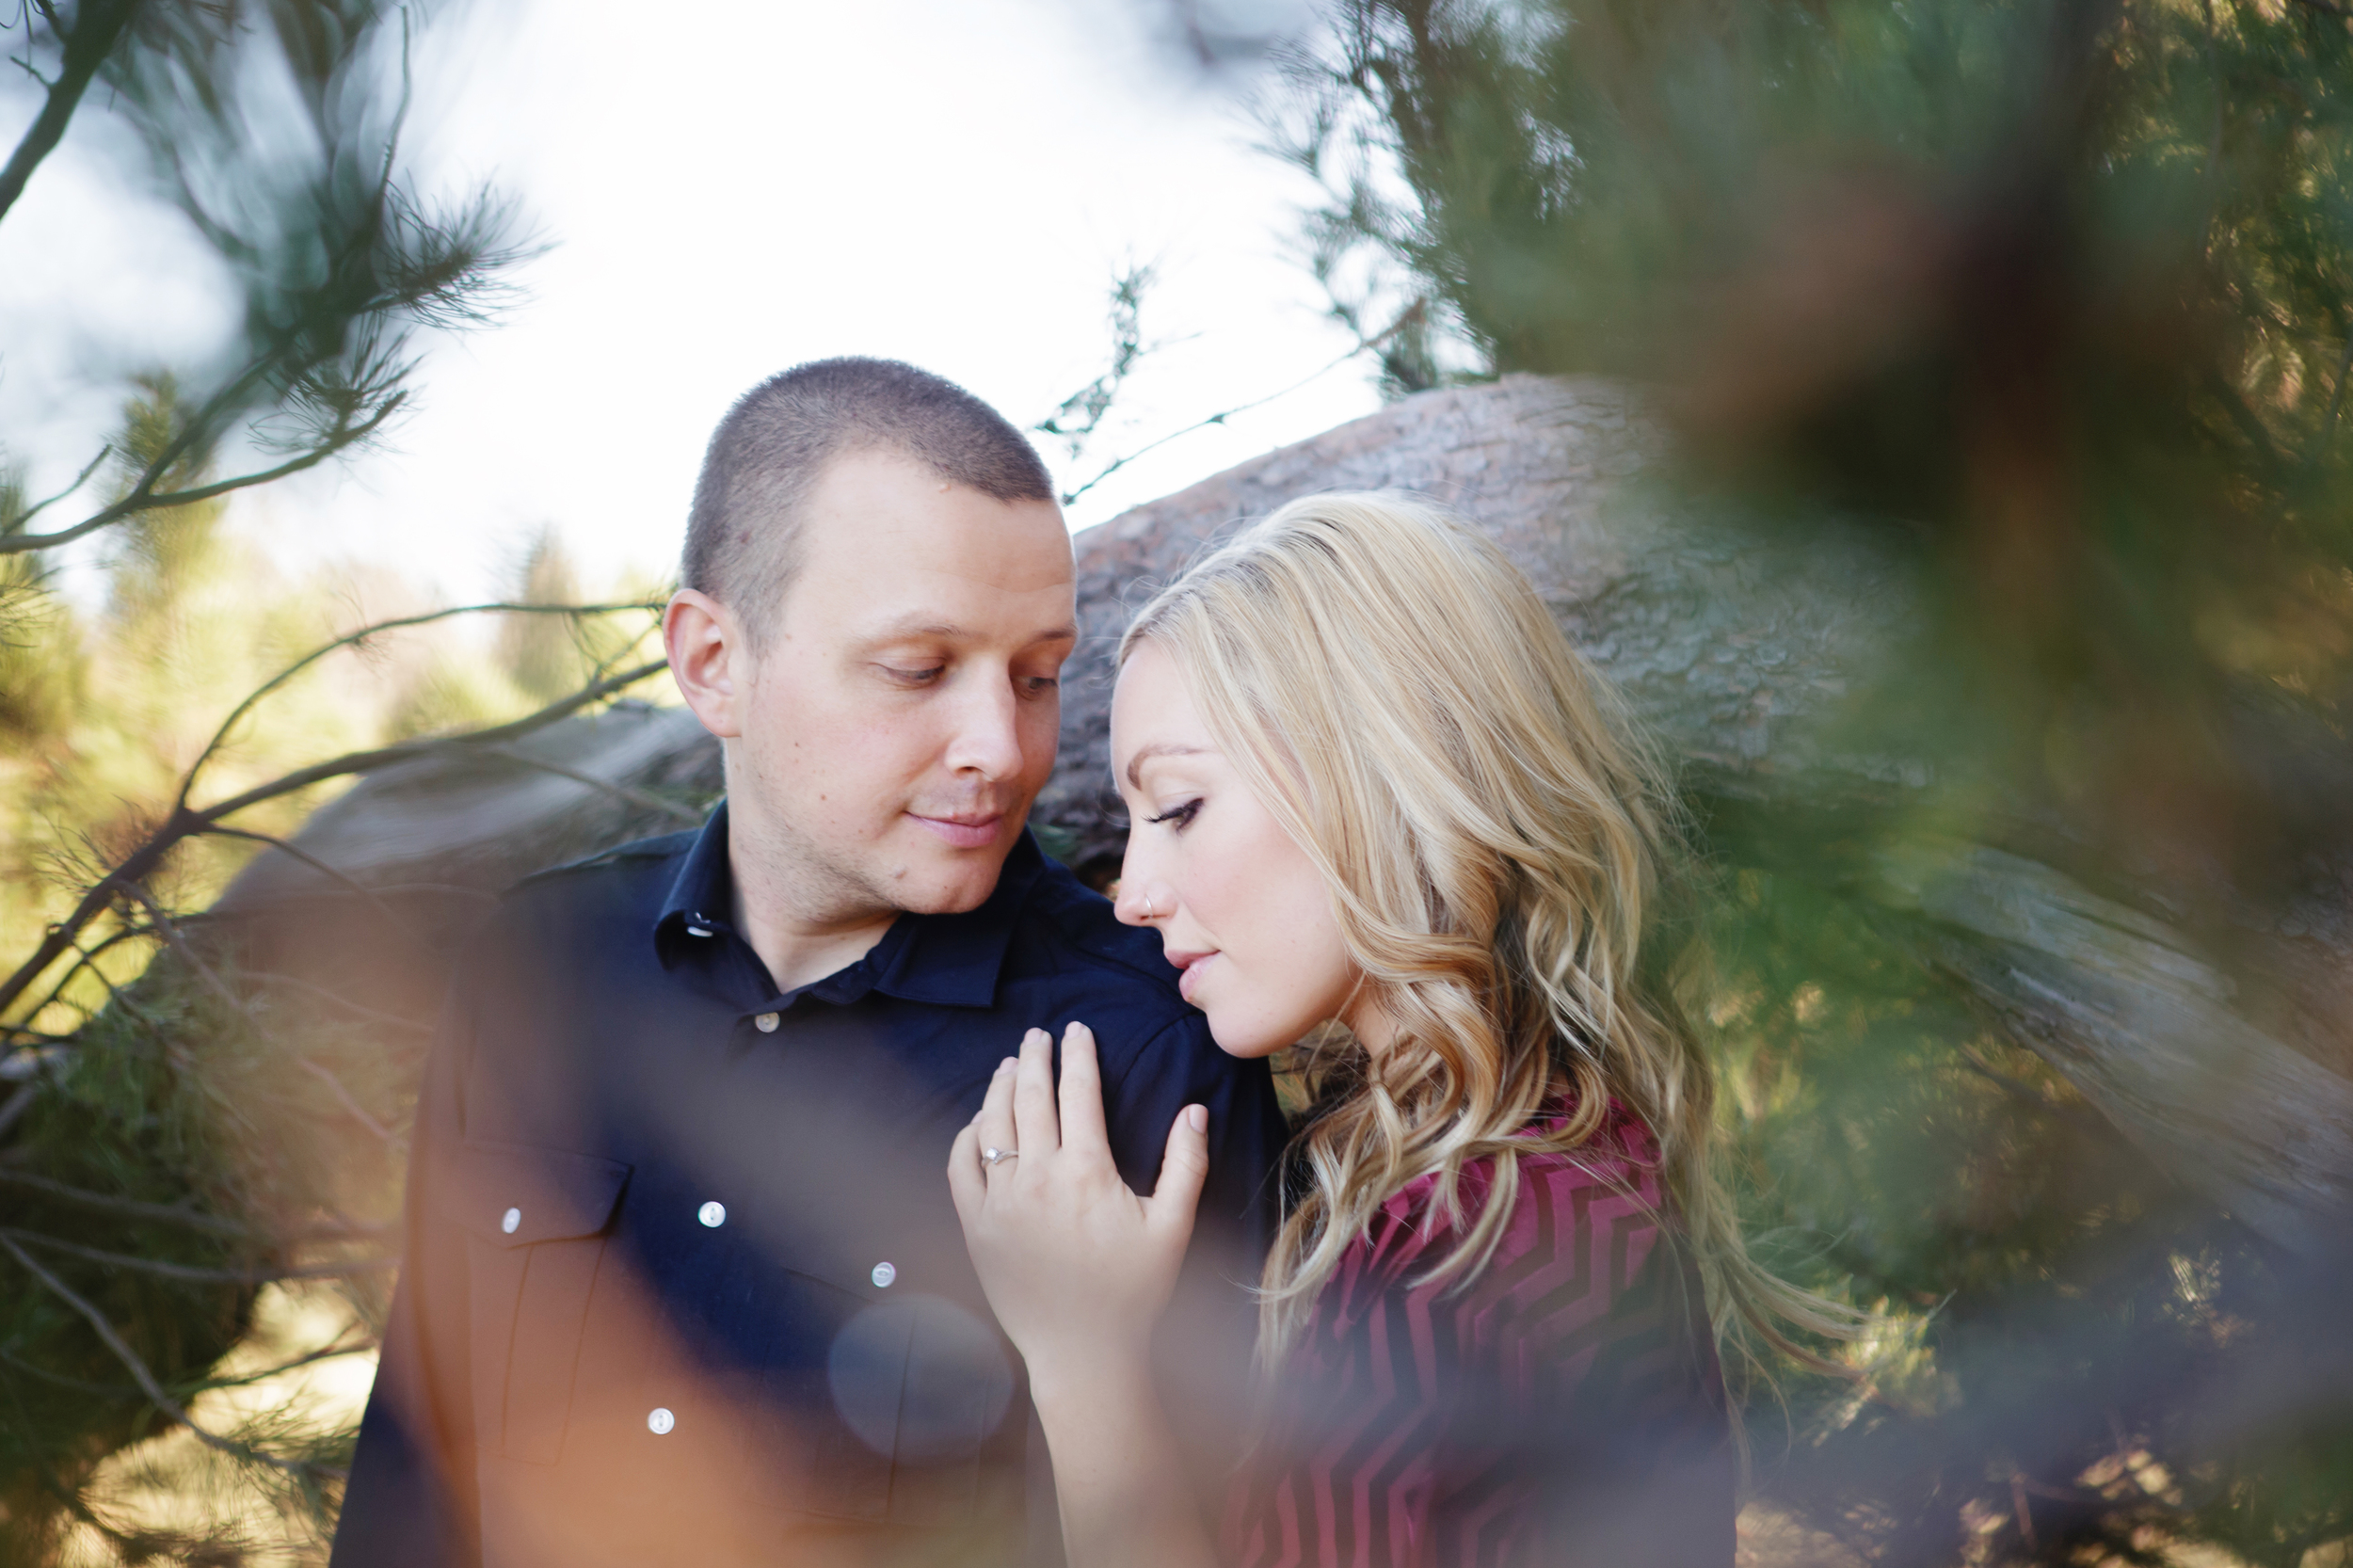
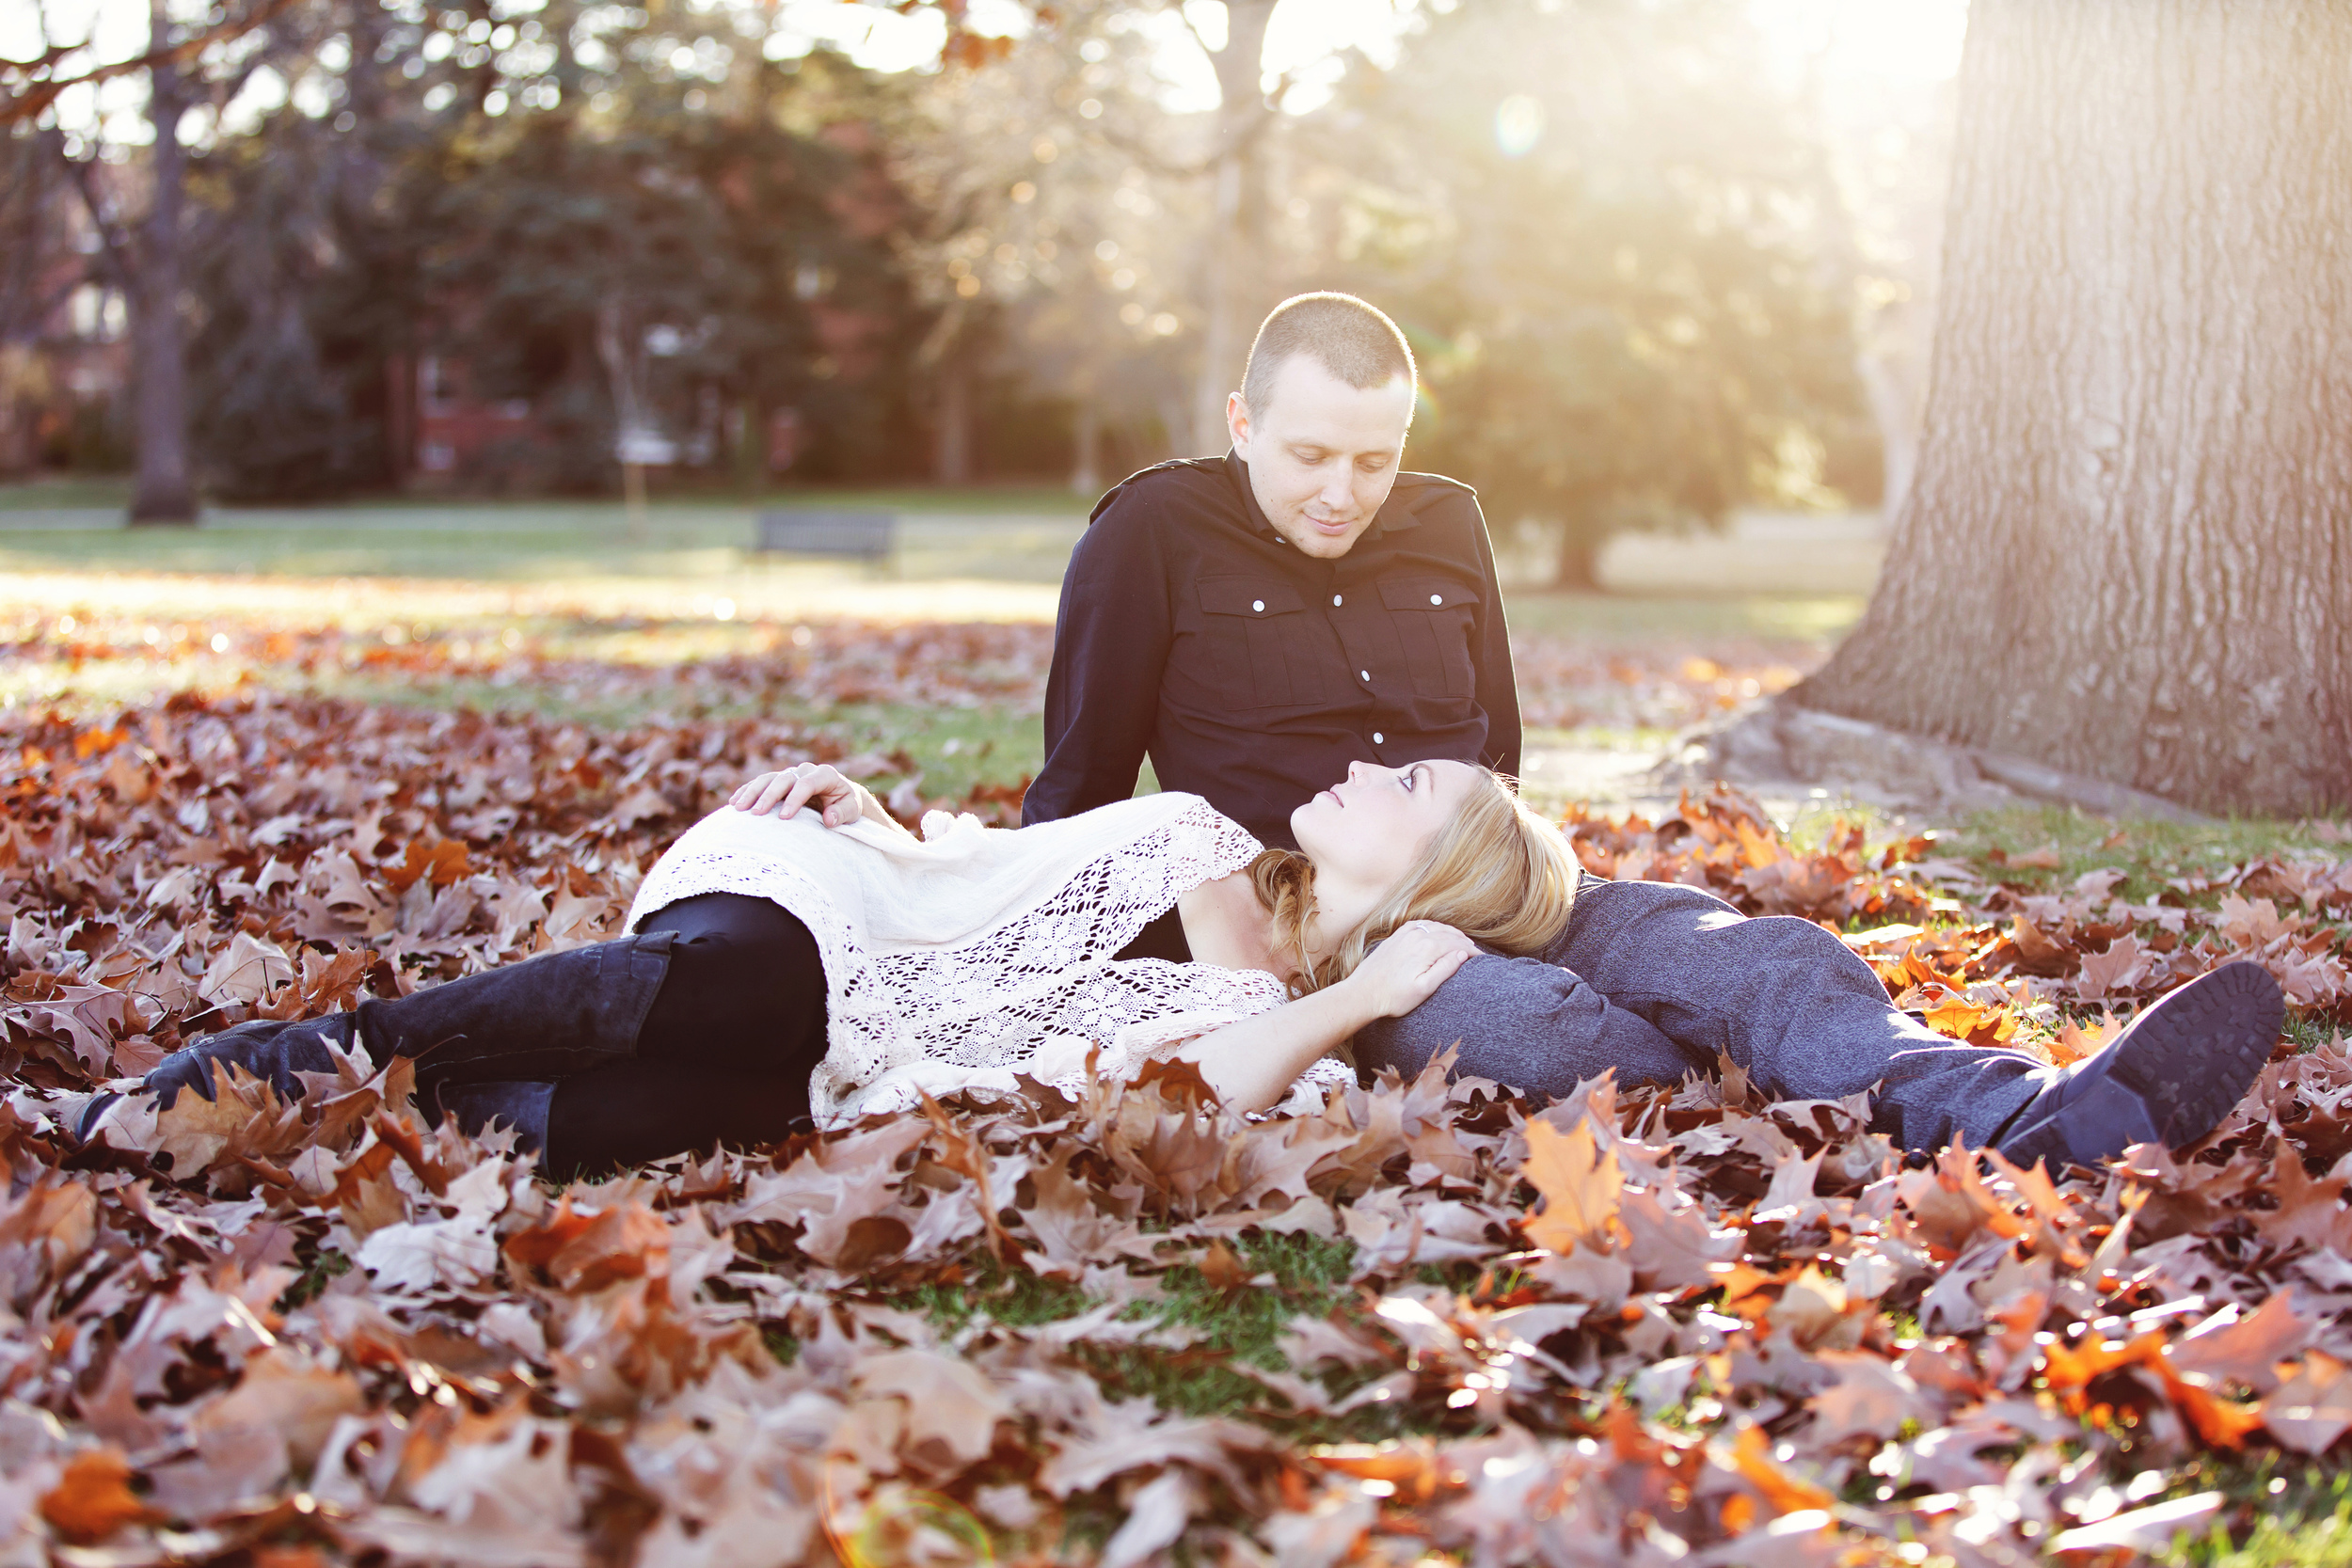
In this case, I received a folder of gorgeous engagement photos and a totally new idea started to form. Jen and Andy are musicians and music lovers, and this photo in particular really spoke to me:

An idea started to form around the idea of a record cover, and as I started to piece together the format and design, I realized this was going to be best seen in person, rather than a digital mock-up. And since Jen was a friend, I decided to surprise her with the design. The plans had changed a bit, and this invitation was going to include a lot of information. After gathering all the details from Jen, I got the draft finished, printed and assembled and sent it along in the mail, just telling her to keep an eye out!
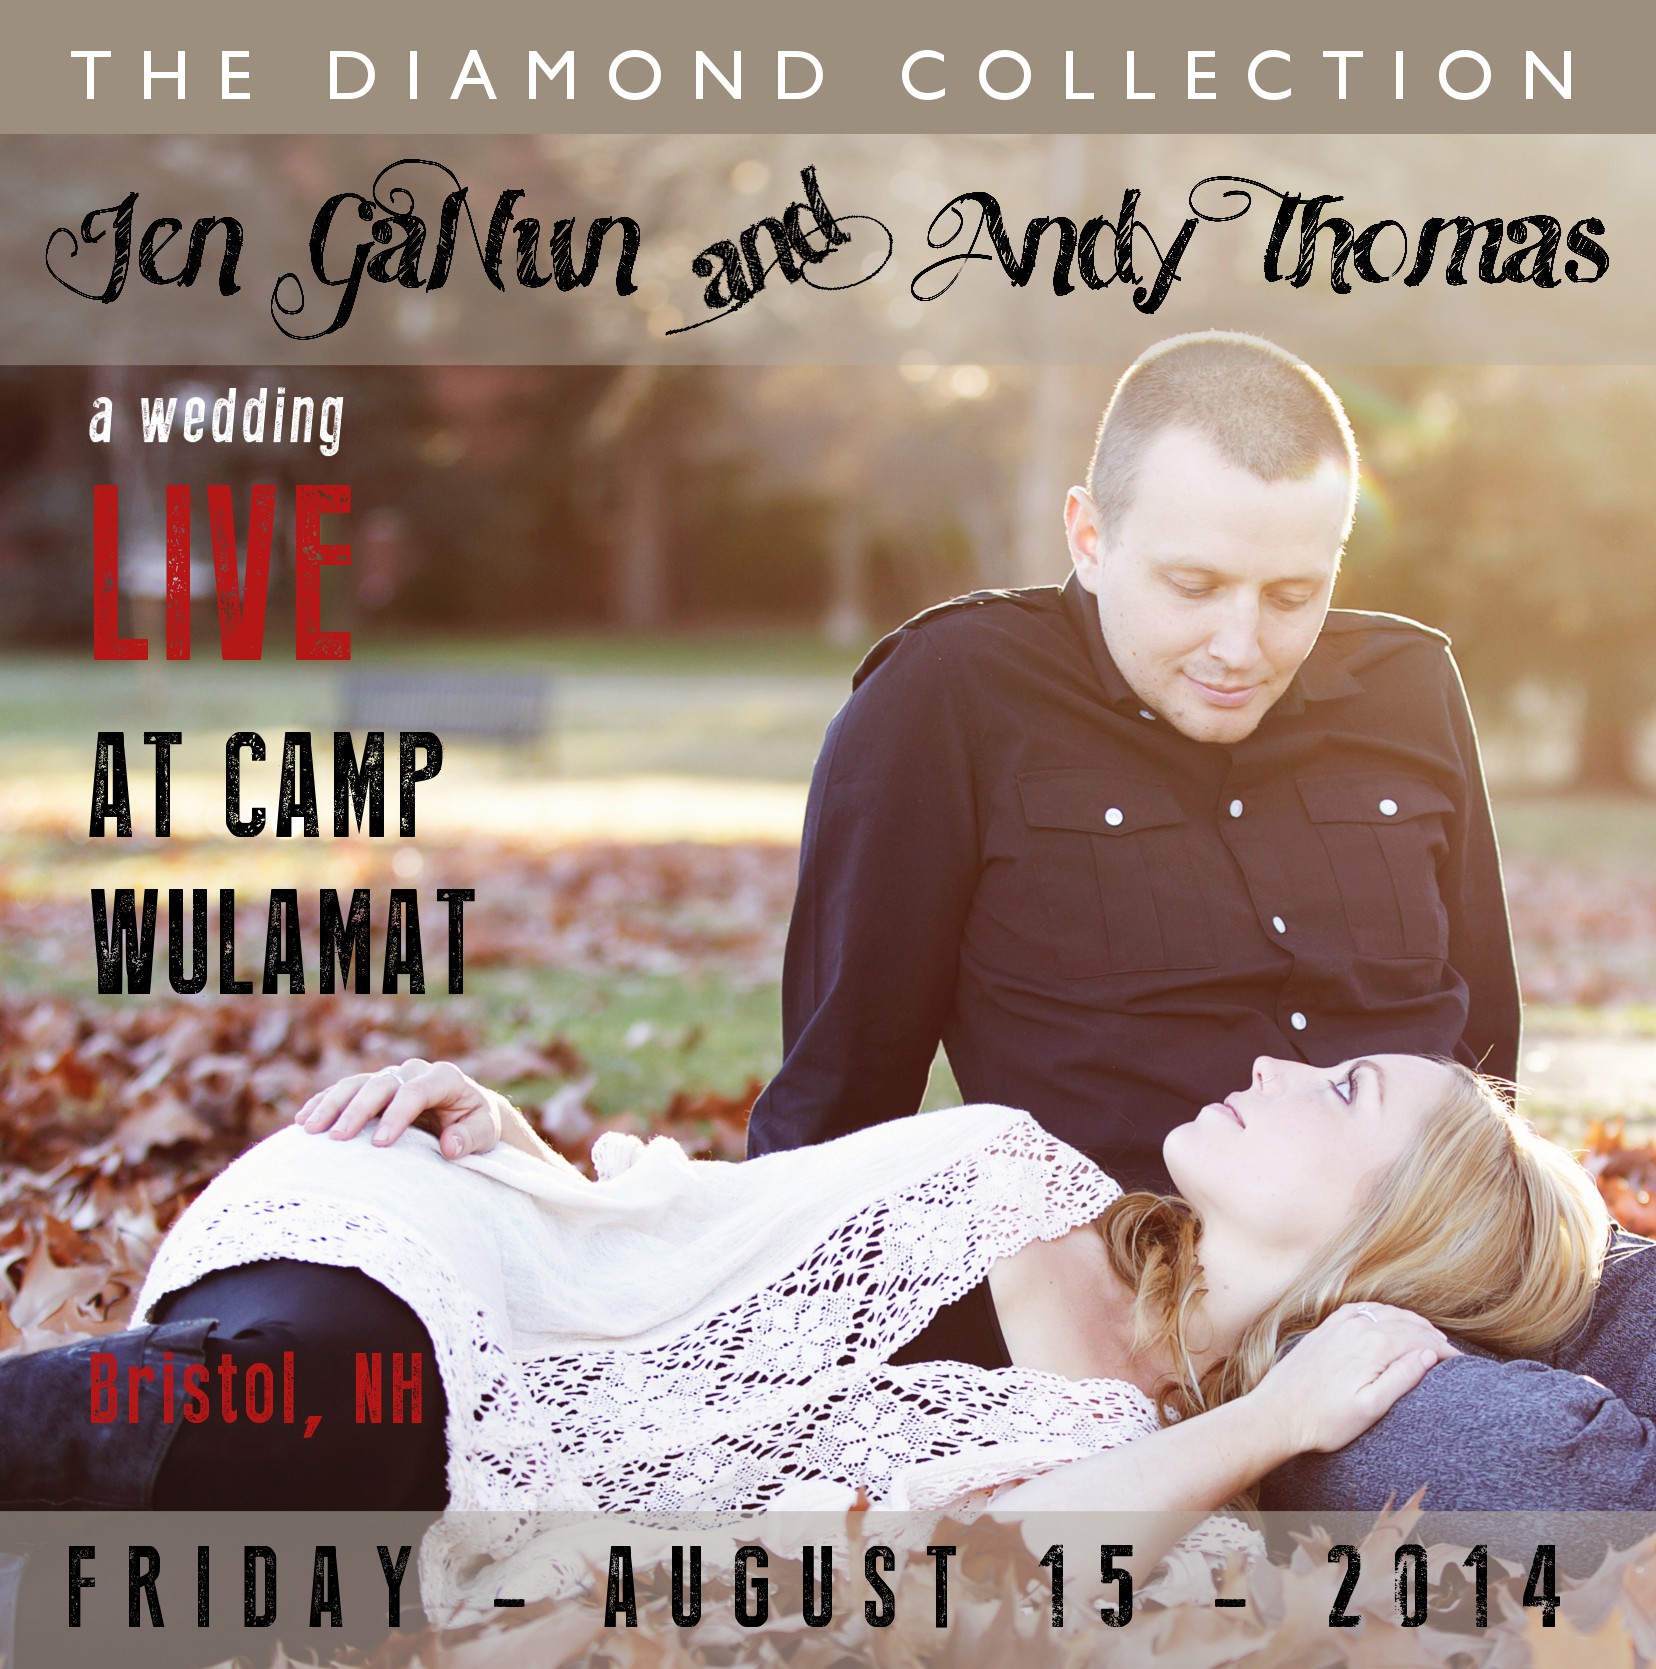

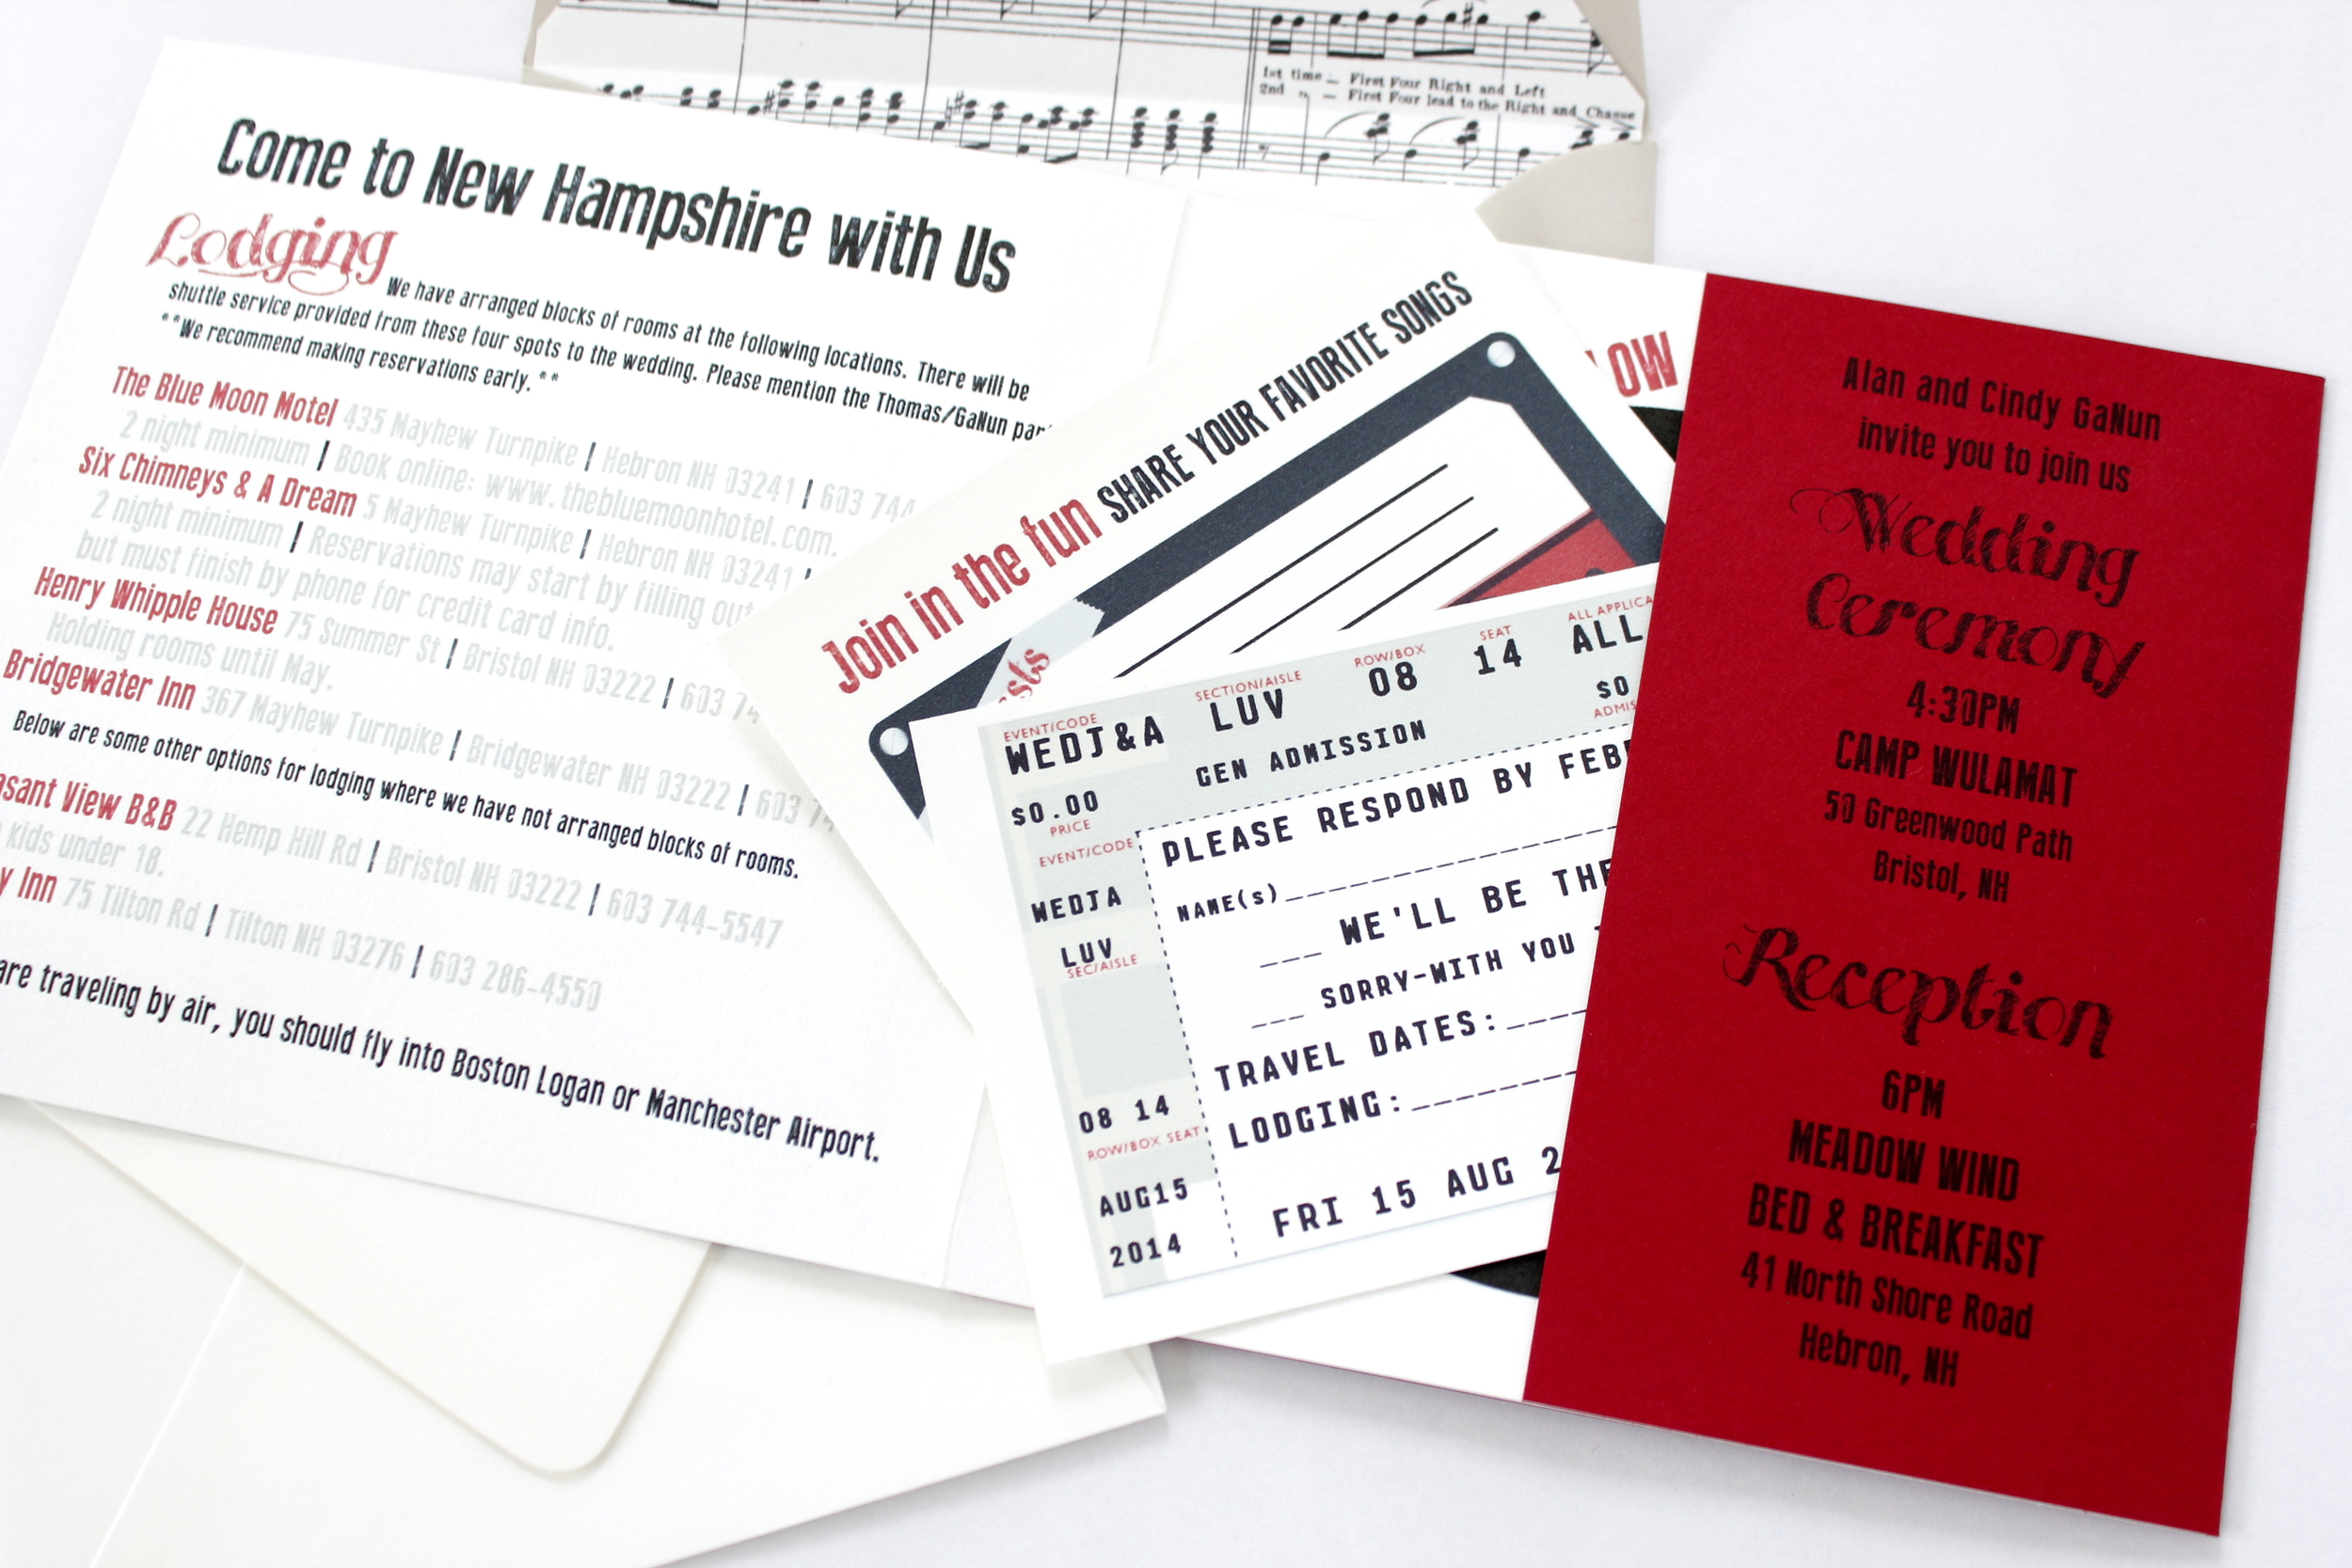
It was designed to look like a record case - A folded card, with a pocket on the inside to hold the necessary insert cards and a printed record background. I used the original whimsical script Jen had liked, vamped up the red a bit, and made the whole thing a little more urban-feeling to reflect their Denver rockstar lifestyle. A few days after it hit the mail, I heard the good news: They loved it!
4. The Details - Putting the finishing touches on a design is maybe my favorite part. This is where I hand my design over, so to speak, to the couple, and let them perfect all the details to their taste and their event.
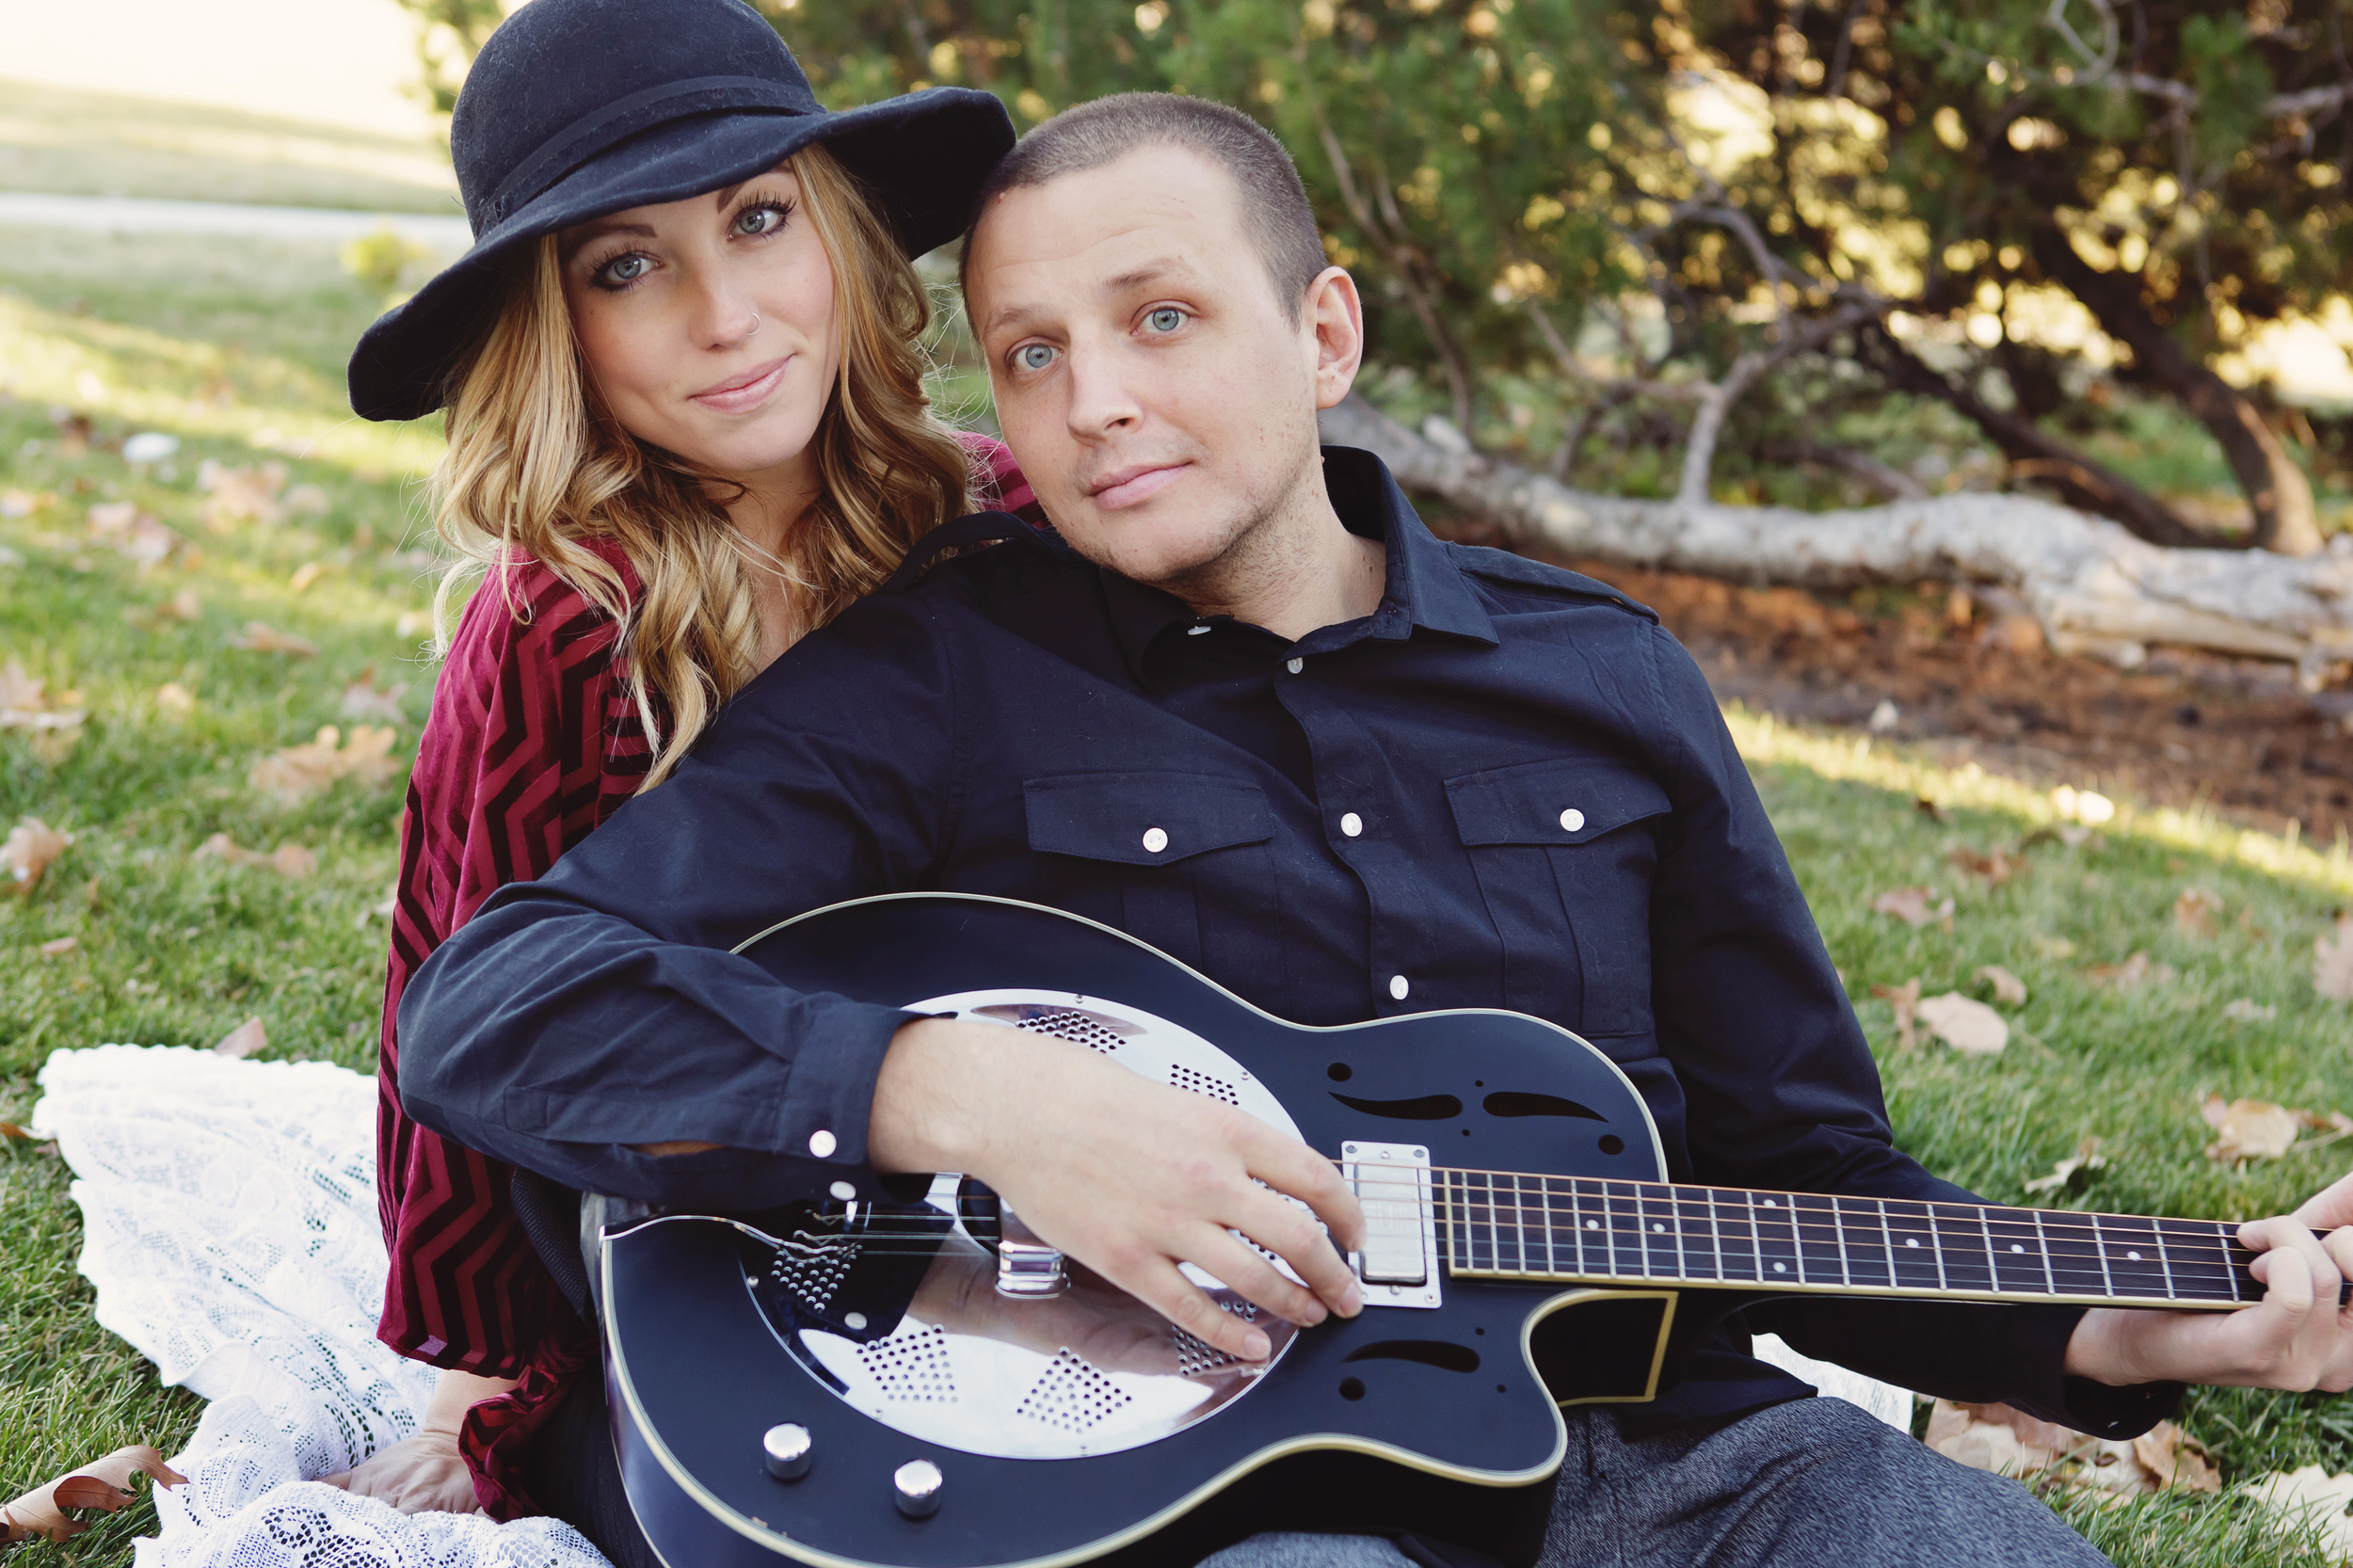
Jen asked to change text on the front from "Diamond Collection" to "Love at 45 RPMS", and we swapped out the photo for one where they were both looking at the camera. I love that Andy's guitar made it onto the cover, and that the color of Jen's shirt plays off the red in the invitation. Jen added her parents' names to the front, and it was good to go! (Aren't they gorgeous?)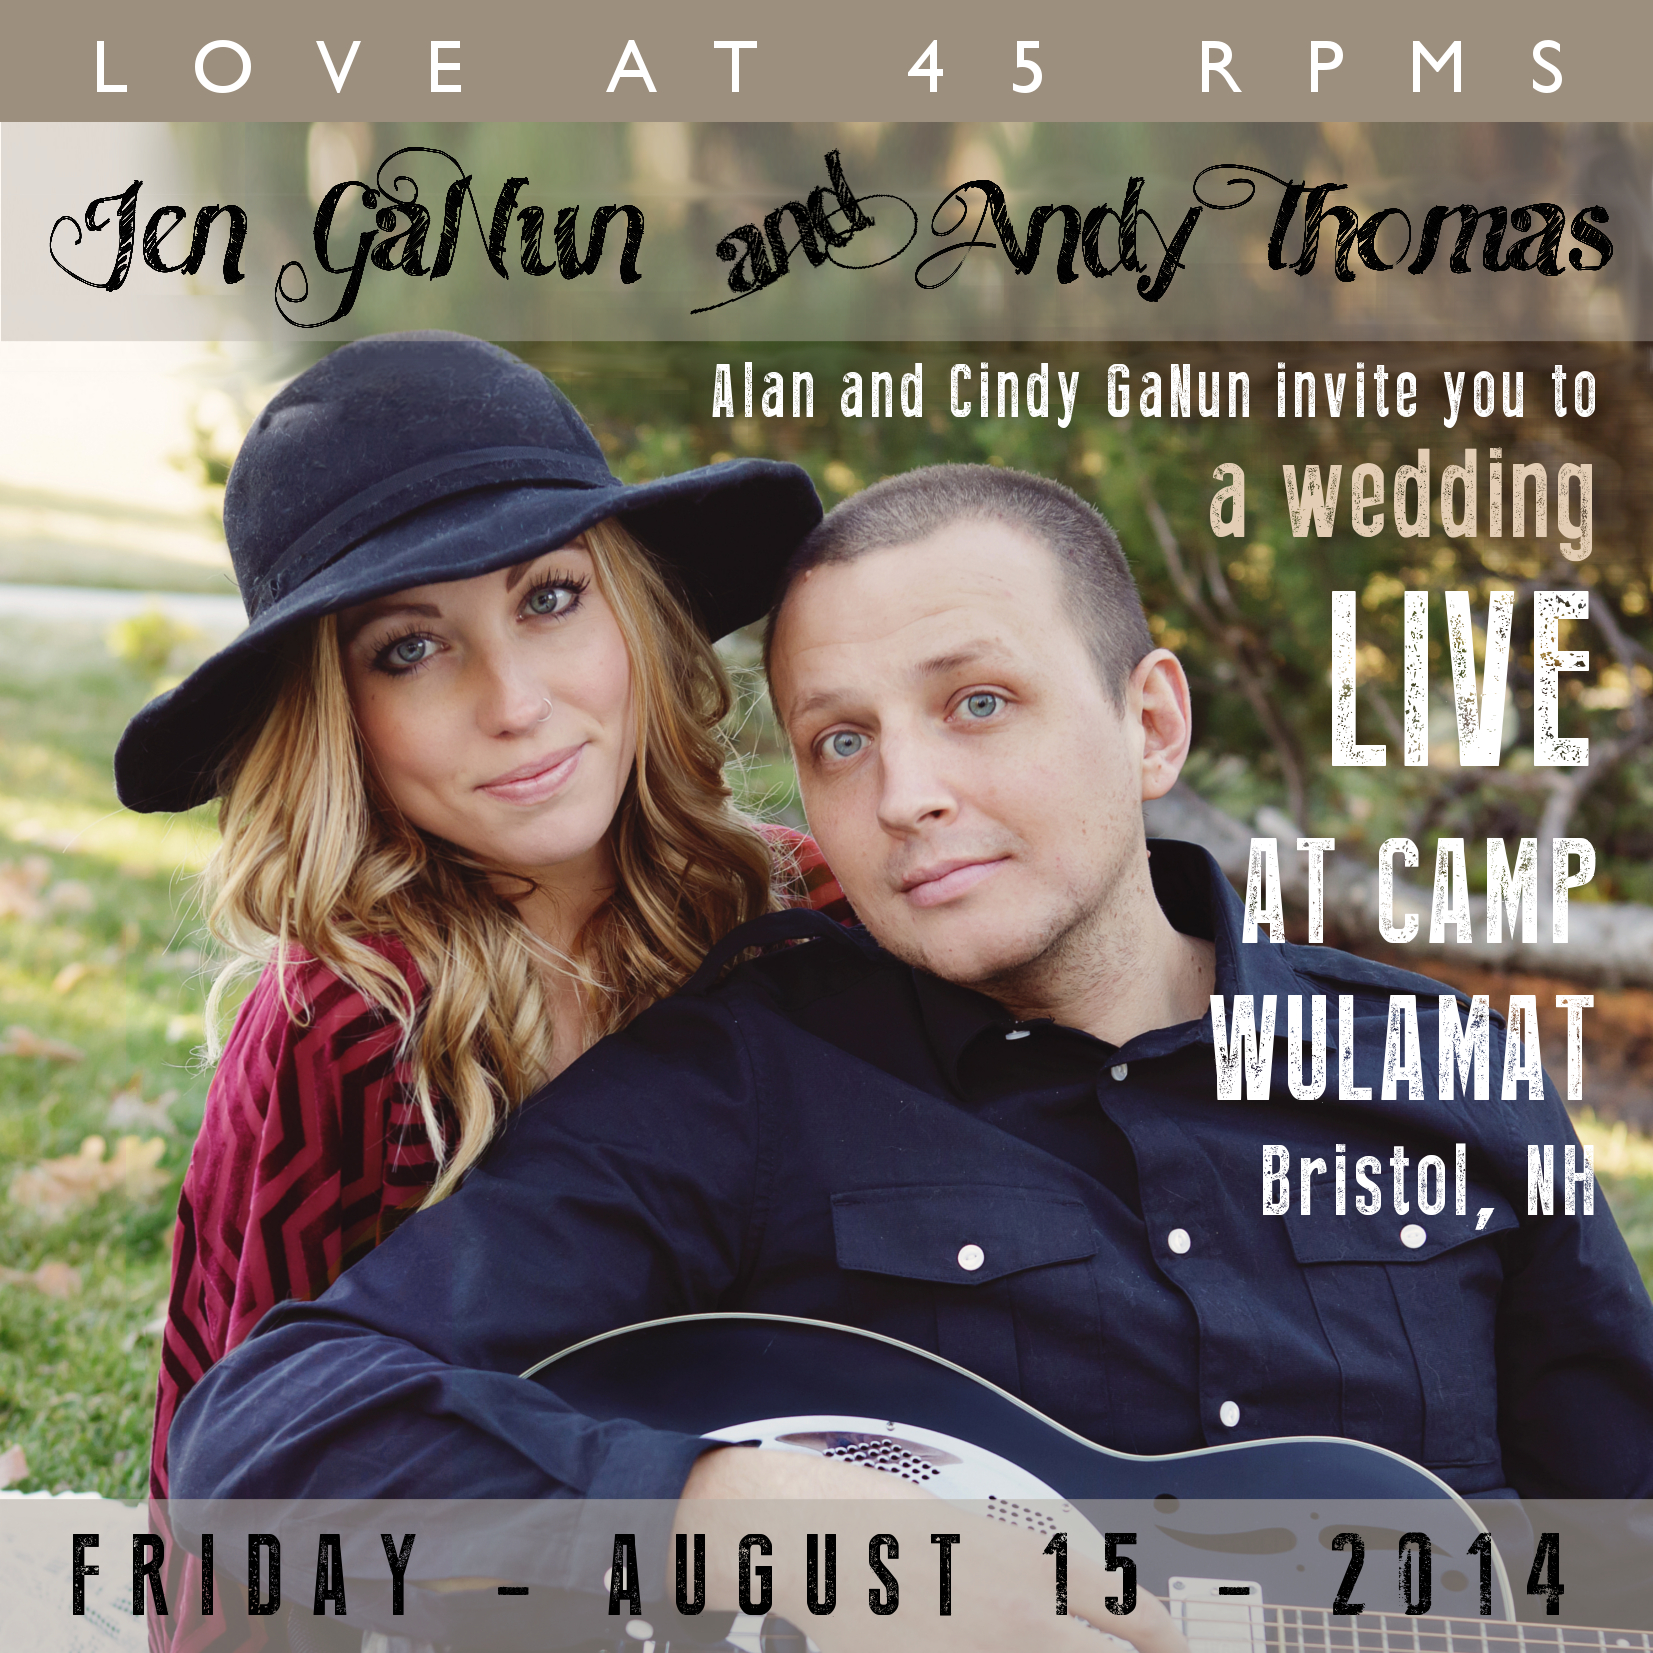
To finish off the theme (I love a good theme) I made the RSVP look like a concert ticket, and Jen asked for a tape deck card for song requests. I also added a little record symbol with their initials on the back cover--I love these little details! They chose a cement deep-flap envelope, on which I printed their guest addresses in coordinating fonts to tie the whole suite together.

5. The Accessories - For many of my clients, the invitation is just the beginning. As the wedding nears, there are other items that get added to the list -- welcome cards, menus, programs, favor tags, you name it. All these printed items can (and should, if you ask me!) be coordinated with your invitations. And the good news is, once the invitations have been finished, all the hard work and decision making has been done. The other pieces come together much more quickly because the design theme is already in place!
Because Jen & Andy's wedding was a destination and the invitations went out so far in advance, they had some more information they wanted to relay to their guests closer to the date and prior to their New Hampshire arrival. When the time came for the "second send-out", as we were calling it, Jen sent along the information she wanted to include and asked if I had any ideas. I thought it might be fun to package the information as a brochure -- the invitation had hinted at a music festival kind of vibe, so I thought it would be cute to play off that idea. Plus, we got to use more of their awesome photos!
![_MG_1983[1]](http://static1.squarespace.com/static/5612e4dde4b0b9b281e9597a/5612e574e4b0eb177eab2086/5612e584e4b0eb177eab2528/1444078980467/mg_19831-e1431537552306.jpg?format=original)
![_MG_1988[1]](http://static1.squarespace.com/static/5612e4dde4b0b9b281e9597a/5612e574e4b0eb177eab2086/5612e584e4b0eb177eab2524/1444078980463/mg_19881.jpg?format=original)
![_MG_1986[1]](http://static1.squarespace.com/static/5612e4dde4b0b9b281e9597a/5612e574e4b0eb177eab2086/5612e584e4b0eb177eab2526/1444078980465/mg_19861.jpg?format=original)
Since Jen & Andy's wedding, I added their invitation to my Etsy shop, and I've had quite a few custom orders. The finished product is always different depending on the couple and their personal choices. Here are a few that show how different this design can look:


This invitation, along with many others, is available on my Etsy shop!
Stay tuned for more Custom Design Process posts!